Specimen labels are the small cards that sit beside a pressed plant or a pinned beetle in a museum drawer. They say what the thing is, where it was found and who found it. On a journal page they do the same job, and they make a spread look like a collection instead of a pile of photos.
This guide covers six ways to use specimen labels in a nature journal or a digital scrapbook layout. It starts with what a good label says, then moves to placement, pairing and the small details that make a page look finished.
Table of Contents
What specimen labels actually record
A real specimen label is short. Collectors wrote the name, the place, the date and the habitat, and usually nothing else. Reading a few of them is the quickest way to learn the format, and the herbarium entry on Wikipedia shows how plant collections are mounted and labelled.
You can borrow that structure for your own pages. A line for what you saw, a line for where, and a line for the day is enough. Specimen labels work because they are brief, so resist the urge to write a paragraph on one.
1. Use specimen labels as captions under photos
The easiest placement is directly under a photograph, slightly overlapping the bottom edge. The overlap ties the two together so the label reads as part of the picture. Keep the label narrower than the photo so it does not compete.
Pick wording that adds something the photo cannot show. “Found near the fern line” tells the reader where, which the image rarely does. A plain “mushroom” adds nothing.
2. Group specimen labels into a collection page
Real collections are lined up in rows, and a page of specimen labels borrows that look. Choose one object type, such as leaves, stones or feathers, and give each item its own label. The repetition is what makes it feel like a study.
Vary the label shapes a little if you have more than one. Two shapes on one page add rhythm. Four start to look chaotic.
3. Write your own specimen labels for what you did not photograph
Some of the best moments of a walk never get a picture. A label with a short line of your own handwriting or typed text can hold the sound of a creek or the smell of wet bark. Blank plates are useful here, because the words are yours and not a pre-written phrase.
Keep the entry to a single line. A field notebook is a record of observations, and the field notes article is a good reminder that the format has always favoured short, dated entries over long prose.
4. Layer specimen labels over paper texture
A label placed on a flat white background looks pasted on. The same label on a foxed or fibrous paper looks like it belongs there. Choose a background in a similar tone, cream on cream or sage on cream, so the edge of the specimen label stays visible without a heavy shadow.
If you are working digitally, a soft drop shadow of a few pixels is enough. Anything stronger makes the label float above the page and breaks the illusion of card stock.
5. Pair specimen labels with a real find
Pressed leaves, a feather or a ticket stub all look better with a label beside them. The label turns an object into an exhibit. In a digital layout, cut the object out and set it next to the label at a similar scale.
If you want a starting point for the pages around them, our guides to nature journal pages and to mushroom journal page ideas both show layouts where a label does the captioning work.
6. Keep a running series of specimen labels
One label is a caption. Ten labels across a season become a record. Number them, or date them, and use the same style throughout so the pages read as a set.
The wording can change while the look stays the same. A season of walks might include “observed in the wild” in spring and “kept for the record” in autumn, and the pages still match.
Choosing words for your specimen labels
The wording does most of the work, so it is worth a minute of thought. Museum labels are plain and factual. Journal labels can be a little warmer, as long as they stay short.
Three kinds of line tend to work. A place line says where you were, such as “just off the trail”. A moment line says what happened, such as “found with muddy shoes”. A record line sounds official, such as “observation no.” followed by a number you write in yourself.
Mixing the three across a spread keeps a page of specimen labels from sounding repetitive. Use one of each and the page reads like a small story.
Common mistakes with specimen labels
The first mistake is size. A label that is larger than the thing it describes pulls the eye away from your photo or find, so scale it down until the object leads.
The second is crowding. Six specimen labels on one page, each with a different shape and colour, look like a sticker sheet. Pick two shapes and keep the colours in one family.
The third is perfect alignment. Real labels were tucked in by hand and sat a little crooked. A slight tilt of a degree or two makes digital specimen labels feel handled, and a ruler-straight row can look stiff.
Putting it together with a ready-made set
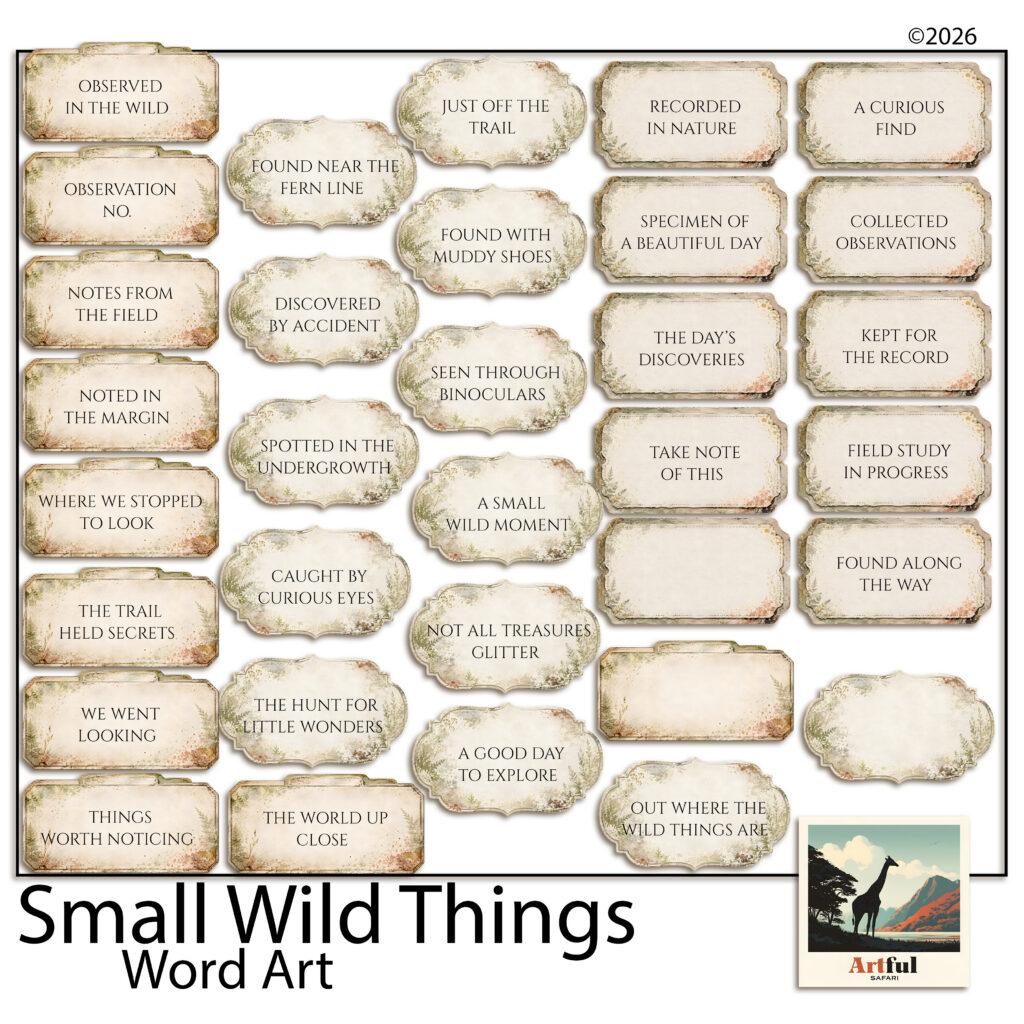
If you would rather not make every label from scratch, the Small Wild Things Word Art kit is one worked example. It is a set of 33 specimen labels as transparent PNG files, with thirty carrying phrases such as “field study in progress” and “the trail held secrets”, and three left blank for your own words.
The labels come in two shapes, a scalloped plate and a notched tag, with fern and rust-coloured foliage in the corners. They sit on a cream card that reads as aged paper, so they pair easily with the earthy backgrounds in the same set. Because the files are cut out around the edge, each of the specimen labels drops onto a page without a white box.
Try one page first. Place a photo, add a single label under it, and see whether the page needs anything more. Usually it does not.
Small details that finish a page of specimen labels
- Match the label size to the object. A tiny leaf with a huge label looks off.
- Leave empty space around specimen labels so each one can be read on its own.
- Use the same two or three label shapes across a spread.
- Keep the text on a label to one line where you can.
- Line up the baseline of neighbouring labels so rows look intentional.
A simple way to begin
You do not need a full collection to start. Take one photo from your last walk, write a single line about where you were, and set it on a label. Once the first page works, the rest of the specimen labels follow the same pattern.