A nature journal is the easiest kind of journal to start and the hardest to keep filling. The first page goes in on a good day with a leaf and a few notes. By the third week the pages feel thin, and the book sits on a shelf.
This guide is for the second problem. Here are six ways to fill a nature journal page so it holds something real, whether you keep it on paper or in a digital scrapbook app.
1. Start the nature journal page with a surface, not a subject
Most people open a nature journal and look for something to record. Try the opposite. Choose the surface first, and let it tell you what belongs on it.
A cream page with pressed fern fronds near the edges leaves the middle open for one photo and a few lines. A plain white page asks for everything, which is why it stays blank. A textured background does half the work before you add a word.
2. Keep one specimen per page
The pages that get finished are the ones with a single subject. One oak leaf, one feather, one acorn cup from the walk home. A crowded page is a page you will not want to open again.
If you collect more than one thing on a walk, give each its own page. A nature journal with twenty slim pages reads better than one with five overloaded ones.
Pairs work too, if they belong together. A feather and the leaf it landed on make one page, because the second thing explains the first.
3. Write the place, the weather and the date first
Before you describe the specimen, put down where you were and what the sky was doing. These three small facts take a few words and make the page useful later. They are also the easiest way to start when you have nothing to say yet.
Plant collectors work this way too. A herbarium sheet is only useful if it records where and when the plant was found, and a nature journal page works the same way.
Add one sensory detail if you can. The smell of wet bracken or the sound of rooks in the oak is the line you will be glad of in a year.
4. Learn two or three names, then stop
You do not need to identify everything. Pick the fern you keep passing and learn what it is called. The Royal Horticultural Society keeps a useful page on garden ferns if you want a place to begin.
Write the name small beside the specimen. A page with a name on it is a page you can find again, and each name you learn makes the next walk more specific.
5. Mix real and digital pieces
A pressed leaf cannot go flat in a phone app, and a photograph cannot be glued into a field notebook without printing it. Digital pages let you do both on one spread. Photograph the real leaf, set it on a botanical background, and add your notes in a text box.
This is also how to avoid damaging anything fragile. The leaf goes back in its envelope while the page you made of it stays in the album. If you want more on the digital side, our guide to building a woodland junk journal covers layering in more detail.
Layout matters less than people think. Put the specimen where your eye lands first, keep the writing in one block, and leave a margin. A page that breathes looks finished even when it is simple.
6. Let colour hold the pages together
A nature journal looks like one book when the pages share a palette. Cream, oatmeal and sand with a little sage and dove blue will go with nearly everything you pick up outdoors. Bright backgrounds fight with the muted colours of dried leaves and feathers.
What to carry so the nature journal page gets finished
Keep the kit small enough that you never leave it at home. A phone for the photograph, a small envelope for anything fragile, and a note app open for the place and the date. That is a complete field kit for a digital nature journal.
Take the photograph before you pick anything up. Shoot the specimen where it grows, then one close picture of the detail you liked. Two photographs are plenty, and choosing between them later is part of the fun.
When you get home, do the page the same day. The weather, the name and the sensory line fade quickly. A page made while the walk is still fresh takes less effort and says more.
Putting it together: a nature journal page from one paper
Here is how the six ideas come together on a single page. I will use the Small Wild Things botanical papers as the example, because they were designed for exactly this job.
Pressed fern, feather and oak papers from the Small Wild Things collection.
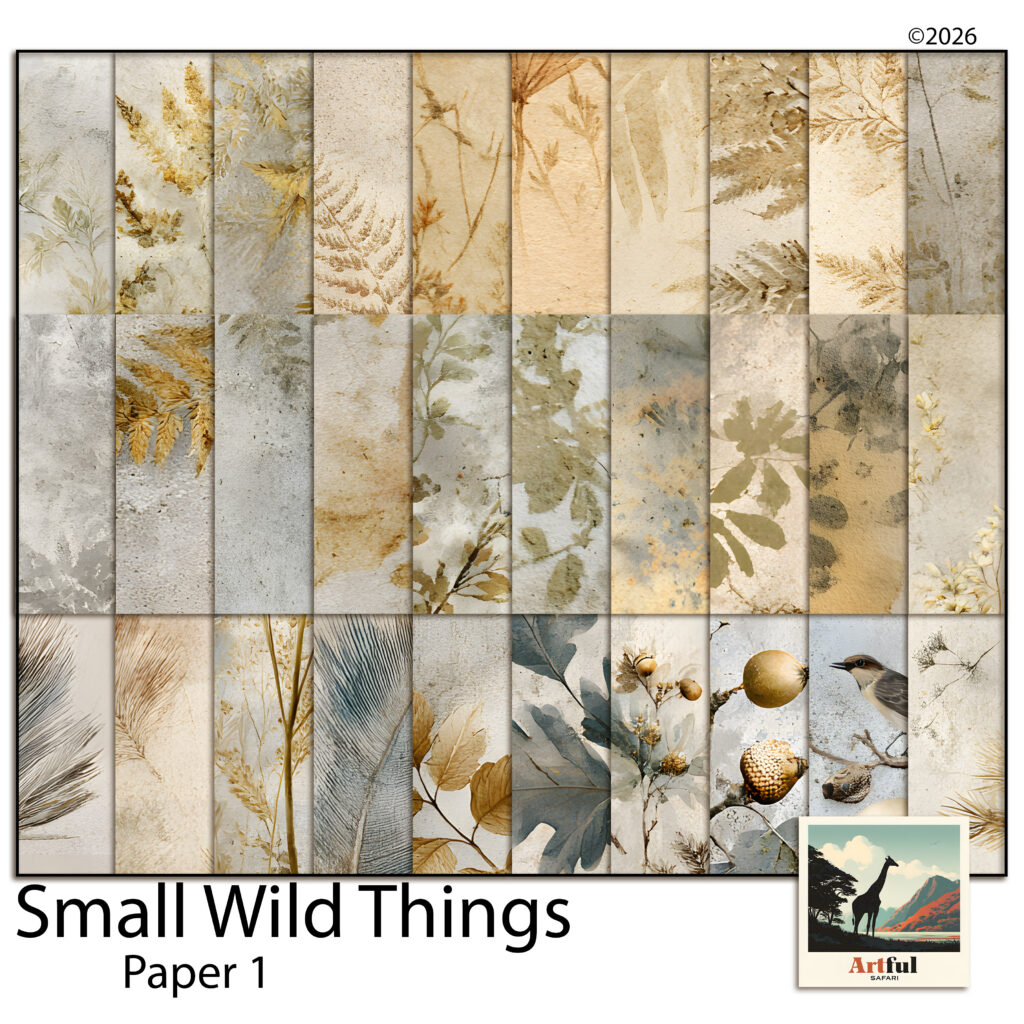
The Small Wild Things botanical background papers are a set of 30 full 12 x 12 in pages of pressed ferns, grasses, feathers, oak leaves and pinecones. The detail sits toward the edges and the centre stays open. That open centre is where your photo and your three lines of notes go.
Pick the paper with oak leaves and acorns for an autumn walk. Choose a soft fern paper when the weather was grey and you only brought home one frond. Drop your photograph in the middle, add the place, the weather and the date, then write the one name you learned.
Because the papers share a palette, thirty pages in a row will still look like one nature journal. That is the quiet advantage of working from a set rather than choosing a new background every time.
Several of the papers in the set carry a small bird or a cluster of mushrooms in one corner. Those suit a page about a woodland edge, where the creature is part of the story and the specimen is not the only point of interest.
Others are almost bare, with only soft washes of colour. Use those under a page that already has a lot going on, such as a spread with three photographs and a long entry.
Keep the next nature journal page small
You do not need to fill a page every day. A nature journal built from short, finished pages beats a long one full of good intentions.
Season by season, the pages add up to a record of one place: the first fern unrolling, the dry grasses in late summer, the oak leaves going to oatmeal and ochre. That record is the reason to keep a nature journal at all, and it only exists if the pages are easy enough to finish.
Next time you are outside, pick up one thing. Give it a page, a place, a date and a name, and close the book.
Give each entry in your solo murder mystery journal two short headings: What I found and What I think it means. Write the clue under the first heading and your guess under the second. Keep any suspect sheet supplied by your game beside the journal, and update it when the rules tell you to.
Here is a page you can try before you buy a game. You need a notebook and a pen. The example is a made-up writing exercise for this guide; it is not a scene or clue from The Crimson Parlour.
To see The Crimson Parlour next to our other games, browse the solo journaling RPGs.
Try a clue and a guess on one page
Use this fictional starting point: someone has left a wet coat beside the study door. A guest says they have spent the whole evening by the fire.
Write these headings on a blank page, then add your own answers. Leave space beneath the guess for a later note.
Entry: The coat by the study.
What I found: A wet coat lay on the chair by the study door. One sleeve had been tucked out of sight.
What I was told: The guest said they had stayed by the fire all evening.
What I think it means: Perhaps the guest went outside. I do not yet know who owns the coat.
Still to ask: Whose coat is it?
Stop when you have written one guess and one open question. That is the end of this exercise. The coat alone does not establish who left it there, when it got wet or whether its owner committed a crime.
If you want to add to the scene, invent a reply from the guest. Keep it under “What I was told” so you can still see which details came from the scene and which came from a character.
Let the game decide who is cleared
When you use this page layout with a published game, follow that game’s rules for clues and suspects. A suspicious detail you add while writing should not change a card result.
The Crimson Parlour shows why this matters. Its rules count a person as innocent when you find one of their cards. The murderer’s cards are sealed in an envelope at setup, so those cards cannot turn up during the search.
A character can still have a secret after they have been cleared. Keep that secret in your story, but leave the cleared result on the game’s suspect sheet. In The Crimson Parlour, that sheet is called the Register.
There is an exception to watch for: an ace ends the night without clearing anyone. Follow the ace’s instructions in the game book. Do not cross out a face merely because you turned a card.
Make your notes easy to find again
Number each journal page as you use it. When a person appears again, add a note such as “Earlier entry: page 4.” This works in a bound notebook; you can leave the pages where they are.
Keep the game’s required records in their stated places. Use your journal’s extra notes for details you want to return to: a name, a remark, a room or an unanswered question.
If a new clue changes your guess, date a new note beneath the old one. For the coat exercise, you might write: “I now know the coat belongs to the gardener. My first guess about the guest needs another reason.” This is an invented continuation, not a game result.
To add paper scraps, leave the headings and page numbers uncovered. Put a small scrap beside the entry, or draw a border around the clue. Read the words once more before you glue anything down.
Read your notes before the ending
When your game asks for a final choice, turn back to your notes. Which details came from the game? Which were statements by characters? Which were your own guesses?
Write your choice using the game’s ending instructions. In The Crimson Parlour, you write the accusation before you look through the unused cards or choose to open the sealed envelope. Your journal records why you chose that name.
Choose a mystery to put in your journal
The Crimson Parlour standalone game is a solo journaling murder mystery set in a snowed-in Victorian house. It uses playing cards and a journal, with thirteen nights in its story.
The standalone purchase is a digital download of the game and printable components. Bring a printer, a deck of playing cards, a journal, a pen, scissors, glue and your own paper scraps. The matching decorative papers and ephemera are sold in a separate bundle.
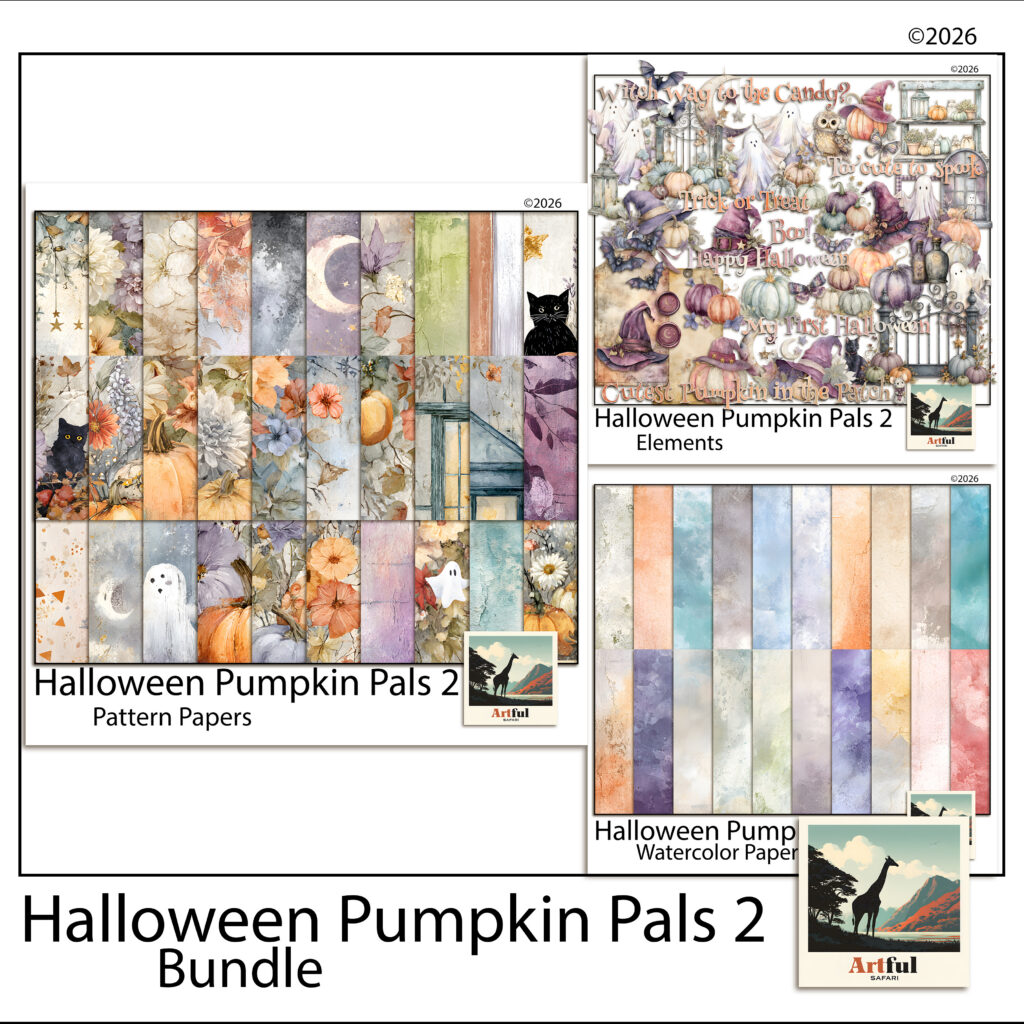
Most Halloween scrapbook ideas assume orange and black. That works for a haunted house party, but it swamps a photo of a toddler in a pumpkin costume. The page ends up louder than the child.
These Halloween scrapbook ideas go the other way: plum, lilac, sage and apricot, cute pumpkins instead of skulls, and a page that still says October at a glance. Seven of them, then a worked example at the end.
Why pastel Halloween scrapbook ideas work for family photos
Costume photos are already busy. There is a hat, a cape, a bucket of sweets and usually a doorstep lit by a porch light. A saturated orange background competes with all of that, and the face gets lost.
Pastel grounds do the opposite. A dusty lilac or a pale sage sits back behind the photo, so the costume carries the colour and the paper carries the season. It also helps if you keep one album for the whole year: October pages in muted colours sit comfortably next to September and November instead of jumping out of the book.
What still makes a page read as Halloween
You don’t need orange everywhere for a page to say Halloween. Three motifs do most of the work: a pumpkin, a witch’s hat and a small ghost. Put one of them near the photo and the season is clear, even on a lilac page. The pumpkin has been Halloween shorthand for so long, back to the carved jack-o’-lantern, that even a pale sage one reads as October.
1. Put a plain wash behind the photo
Start with the plainest paper you have and put the photo straight on it. A watercolour wash with no print on it gives the photo somewhere quiet to sit. Save the patterned paper for the page behind the wash, or for a strip along one edge.
This one change clears up most crowded Halloween pages. If you only try one of these Halloween scrapbook ideas, try this one.
2. Choose one accent colour and repeat it three times
Pick the colour that shows up in the costume. If the cape is purple, pull plum into a title, a tag and one element. Three small repeats tie the page together better than one large block of colour.
Apricot is a good second choice because it is the pastel version of pumpkin orange. It keeps the Halloween hint without the glare. For more on pairing muted tones, there is a longer guide to sage green colour pairings that applies here too.
3. Let the pumpkins carry the theme
Most good Halloween scrapbook ideas start with a pumpkin. One good pumpkin cluster at the base of a photo does more than ten small ones scattered around it. Anchor the cluster to a corner so it looks like it is sitting on something. A garden gate or a shelf behind the pumpkins gives them a place to be, which reads as a scene rather than stickers.
Pumpkins wearing witches’ hats are the easiest way to keep things cute. They are a joke a small child gets straight away.
4. Use word art as the title, not as decoration
Word art is where a lot of Halloween scrapbook ideas go wrong, because it is tempting to use several. A phrase like “Too Cute to Spook” or “My First Halloween” works best as the page title, placed close to the photo and slightly overlapping it. Keep it to one phrase per page. Two titles fight over which one is the headline.
For a first Halloween, the date matters more than a clever line. Put the year on a small tag under the title so the page still makes sense when the child is twelve.
5. Keep the ghosts small
Ghosts are where cute Halloween scrapbook ideas can tip into creepy. They turn scary when they are big and close to the edge of the page. Small ghosts floating in a corner, or peeking out from behind a photo, stay friendly. Two or three at different sizes give the page some depth.
The same goes for bats. A trio flying out of one corner looks like movement. A dozen spread across the page looks like wallpaper.
6. Build a two-page spread from one paper
For a trick or treat night with lots of photos, use the same patterned paper on both pages and change only the wash behind each photo. The reader sees one evening across the spread, and each photo still gets its own quiet space. Among these Halloween scrapbook ideas, this is the one that makes an album look planned.
Halloween pages are the ones people forget to journal on, because the photos seem to say everything. They don’t. Who picked the costume, and which house gave out the full-size chocolate bars, are the details worth keeping.
Of all the Halloween scrapbook ideas here, this is the one you will be most glad of later. A plain tag is enough, or a rectangle cut from one of the plain plaster-look papers. Tuck it under the pumpkins so it looks like part of the scene.
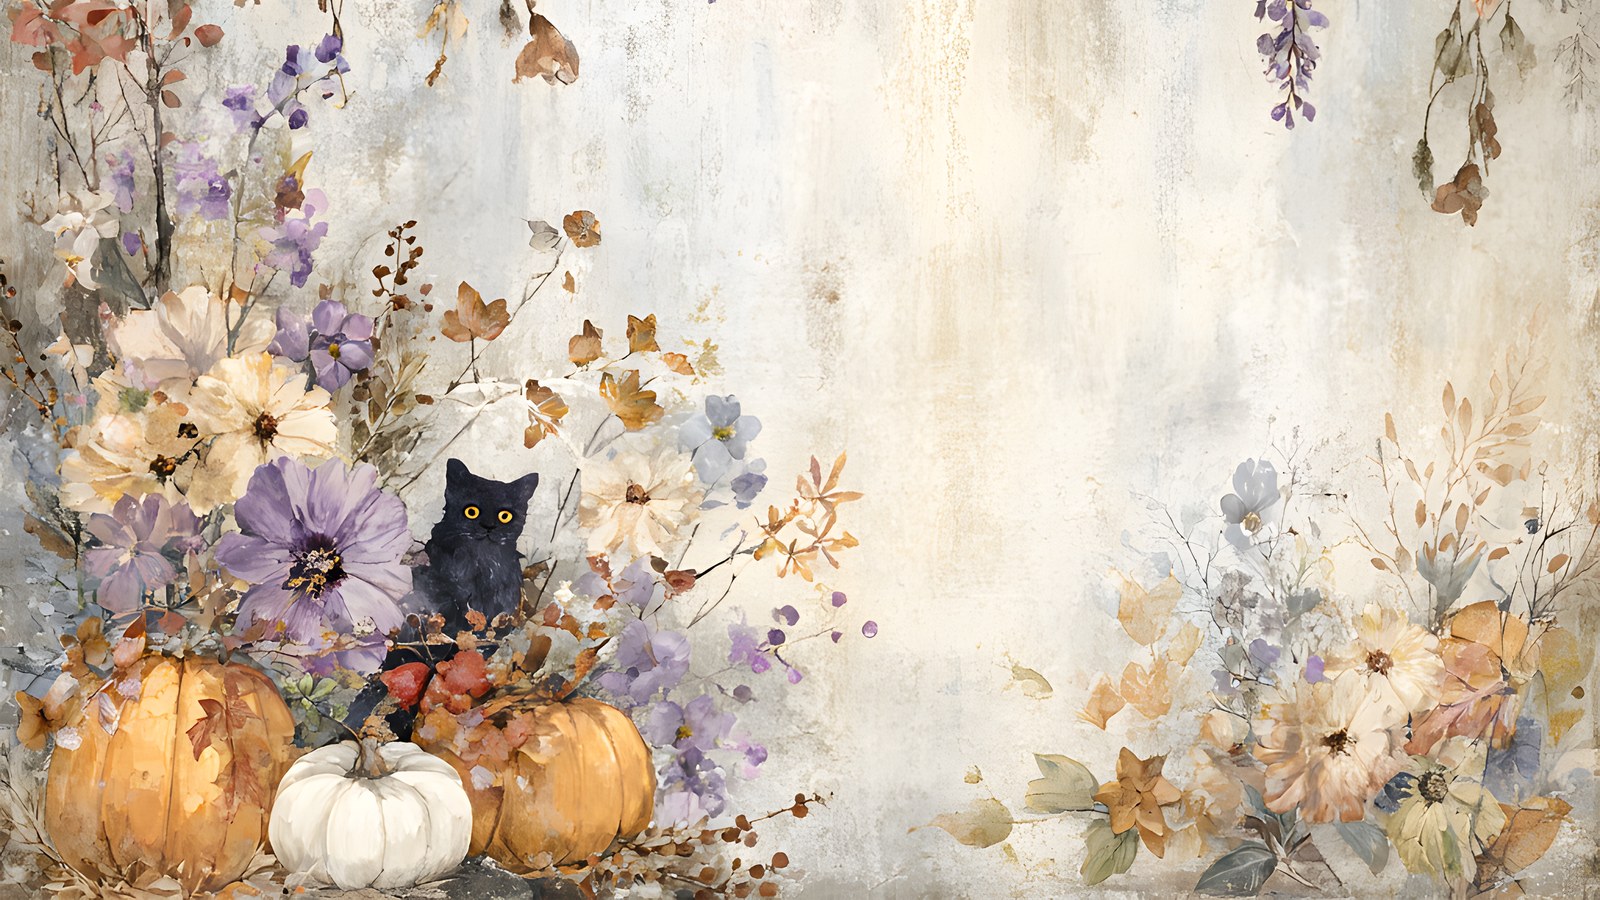
For the background, the pattern paper with lilac wisteria along the top and a black cat among the pumpkins at the bottom.
Behind the photo, a pale blue watercolour wash, trimmed a little larger than the photo and set just above centre.
The costume shot goes straight on the wash.
The iron garden gate with pumpkins sits overlapping the lower right corner of the photo.
“Too Cute to Spook” in apricot lettering goes in as the title, overlapping the top left corner of the photo.
Three purple bats fly out of the top right corner.
A small tag tucked under the gate holds the journaling, with the date and one line about the night.
That is seven steps on one page. The cat on the paper and the pumpkins at the gate carry the Halloween theme, the wash keeps the photo clear, and apricot repeats three times: in the title, in the peach pumpkins at the gate, and in the date on the tag. The page has no orange and black background, and it still reads as October from across the room.
Where to take these Halloween scrapbook ideas next
Try the plain-wash rule first, on a page you already have. Swap the patterned background for a wash behind the photo and see how much the costume comes forward. Once that works, the other six are small adjustments on top of it.
Photos from an aquarium visit bring the same problem to every scrapbook page layout: they are all blue. The tanks are blue, and so is the grey smear where a ray swam past faster than the camera. Snorkelling photos are worse, because the camera was in the water too.
There is a reason for that. Water absorbs the red end of the light spectrum and leaves the blue behind, according to NOAA’s explanation of why the ocean looks blue. So the photos arrive already tinted.
If you then reach for blue papers because the theme is the sea, the whole page ends up one colour at one brightness, and it goes flat.
Working through the page in this order stops that happening. It works for ocean scrapbook page layouts whether the photos came from an aquarium or from snorkelling off the beach.
Pick one photo to be the hero. Choose one with a clear shape in it, like a face against the glass or a turtle close to the lens.
Then choose two or three supporting photos and put the rest aside for another page. A scrapbook page layout with eight near-identical blue photos reads like a contact sheet. With one large photo and a few small ones, the eye knows where to land first.
2. Layer blue on blue by changing the value
Value is how light or dark something is once you ignore the colour. Two blues at the same value merge into one shape, however different they look in a paper preview.
So use papers at three levels of brightness: a pale one as the full-page base, a mid blue cropped to a smaller block, and a narrow dark strip. That is why navy is the most useful paper on an ocean page. A narrow band of navy behind the hero photo gives the eye an edge to find.
Then squint at the screen until everything blurs. If the photo still stands out as a distinct block, the values are working.
An all-blue scrapbook page layout needs something warm to push against, and sand or a soft coral does the job. A strip of sand-coloured paper along the bottom reads as the seabed without you having to draw one. A single peach shell near the photo makes the blues around it look bluer.
3. Put the hero photo inside a water-shaped mask
A clipping mask is a black shape that a photo gets clipped to, so the photo only shows where the black is. A rectangle works, but a mask with a cloudy, watery edge makes the photo look as if it is sitting in the water rather than stuck on top of it.
Match the edge to the photo. A snorkelling shot looking up towards the surface suits a mask with rippled light along its top edge. A tank photo suits one with bubbles rising up one side or seaweed along the bottom.
In the layers panel, the mask layer goes underneath and the photo layer goes directly above it. In Procreate you tap the photo layer and choose Clipping Mask from the Layer Options menu, and the Procreate Handbook page on masks covers the details. Photoshop, Affinity Photo and Artisan each have their own version, and there is a walk-through for them in how to use clipping masks in digital scrapbooking.
Once it works, the photo shows only inside the mask’s shape, and you can still move and resize it until the subject sits where you want.
4. Group the smaller photos in a frame cluster
Supporting photos look scattered when each has its own frame dotted around the page. A frame cluster groups them for you: several frames already arranged together, with coral and shells tucked around them.
The openings are transparent, so the photos go on a layer underneath the cluster and show through. Crop each photo close around the one thing it shows, such as a starfish or the sign with the name of the tank.
5. Where labels and journaling go on a scrapbook page layout
Words are easier to read when they sit next to the thing they describe. A label with the name of a fish belongs beside that fish’s photo. A label with the date and place can sit on the edge of the hero photo, overlapping it slightly so the two read as one unit.
Longer journaling needs a surface of its own, and a journal card is the easiest one to use. Write down what the photos cannot show, like who pressed their nose to the glass and which fish ended up with a name.
Make a pocket strip from journal cards
If you like pocket page scrapbooking, you can borrow the idea without giving it a whole page. Line up three square journal cards along the bottom of a 12 x 12 page. If your cards are about three inches square, three of them fill most of the width and leave a margin either side.
Put your journaling on one card and a small photo on another. The third can carry a single element or a word. A row like that gives the scrapbook page layout a firm base, and it gives the reader somewhere to go once they have looked at the photos.
6. Tuck in the elements and add a title
On any scrapbook page layout, elements work best when they touch something. Let a strand of seaweed come out from behind the hero photo (put its layer below the photo so part of it is hidden), and let a few bubbles rise from it towards the title. Elements floating with space all around them look pasted on.
Keep the drop shadows consistent, with the light coming from the same direction on everything. A page where some elements have shadows and some do not looks like a mistake.
For the title, fit the words to the trip. A snorkelling page might say Beneath the Surface, while an aquarium page can simply name the place you went. A cream title stands out best along the navy strip.
Putting it together: an aquarium scrapbook page layout
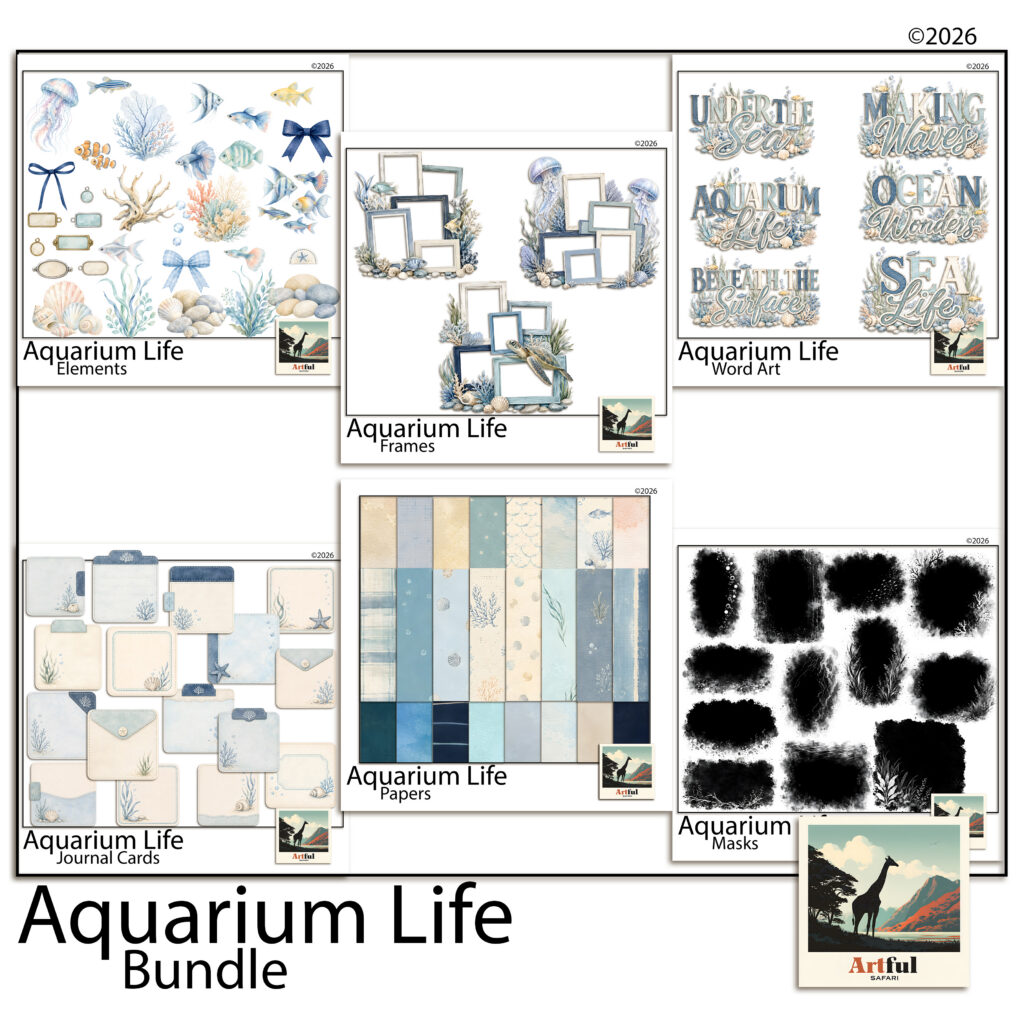
The Aquarium Life kits I designed have a piece for each of these steps, so here is one scrapbook page layout built with them.
The six Aquarium Life kits, which between them hold everything used in this scrapbook page layout.
Start with the watercolour paper of fish among coral as the base. It is cream with pale blue washes, so it keeps the page light.
Lay a band of the plain navy paper across the middle. Crop the mid blue bubbles paper to a block a little bigger than the photo and set it on the navy, then clip the hero photo to the mask with light rippling along its top edge and place it on the blue block. A strip of the sand paper along the bottom becomes the seabed.
The smaller photos go into the frame cluster with the sea turtle, off to one side. Below it, three journal cards make the pocket strip: the ruled card holds the journaling, the card with a starfish in its corner takes a small photo, and the third carries one of the metal-framed labels with the date on it.
Seaweed and a branch of coral come out from behind the hero photo, bubbles rise towards the Beneath the Surface title, and a navy bow sits on the date label. The bundle has 92 pieces across the six kits, so one trip’s worth of photos can fill several pages without repeating a paper.
A last check on the scrapbook page layout
Zoom out until the scrapbook page layout is the size of a thumbnail. You should see the hero photo first, then the title, then the journaling. If one of them is lost in the blue, go back to step two and move a paper lighter or darker.
Most of the time that one change is all the page needed.
A gothic scrapbook page is easy to want and awkward to finish. You lay down a black damask ground, add holly and a raven, and by the third layer the page has drifted away from Christmas and landed somewhere near Halloween.
The fix is almost never more decoration. What has usually gone wrong is contrast, plus the question of where the warm colour is allowed to sit.
Below are six rules I keep coming back to when I build a gothic scrapbook page for Christmas, with a worked example at the end.
Table of Contents
Why a gothic scrapbook page stops reading as Christmas
On a bright kit the paper does the festive work for you. Cream and pine green announce the season before you have placed a single element.
A dark ground announces nothing at all. It hands you atmosphere and takes away every seasonal cue the eye normally leans on, so each cue has to be put back deliberately.
The second problem is value rather than colour. Value is simply how light or dark a thing is, and charcoal ivy on charcoal paper is technically present and effectively invisible, and a page built from near-misses like that reads as a smudge from across the room.
What the eye actually reads as Christmas
Shape carries more of it than colour does. A bauble silhouette or a star with long points will do the job on its own, even in near-black.
Warmth carries the rest. Put one warm source somewhere on the page, whether that is a candle, a lantern or the rim of a gold label, and the eye reads midwinter indoors rather than a graveyard at dusk.
Rule 1: commit to one dark ground
Pick a single dark paper and let it run the whole gothic scrapbook page. Bottle green, charcoal or oxblood all work as that ground. The mistake is using two of them as grounds on the same layout, because then neither one is the background the rest of the page can sit on.
If you want variety, change the pattern rather than the colour. A damask and a plain sheet in the same bottle green will layer happily, where a bottle green damask over a charcoal plain fights for the eye.
Plain grounds are worth more than people expect in a gothic scrapbook layout. A photograph on a plain slate sheet with one sprig in the corner looks composed; the same photograph on a busy pattern looks stranded.
Rule 2: red is a spice, and it should be oxblood
Bright, saturated Christmas red is the fastest way to make a dark page look like fancy dress. Against black it jumps forward off the paper and starts to buzz at the edges.
Oxblood, a deep brownish red, does everything red needs to do here. It looks like a red that has been sitting in a dark room for a century, so it reads as festive without shouting.
Keep it to small things. Berries, a ribbon tail, one bauble and the edge of a torn label add up to enough red for a whole page, and that restraint is what keeps a gothic scrapbook page looking designed.
Rule 3: put the gold where you want the eye to land
Tarnished gold behaves like light on a dark gothic scrapbook layout, which makes it the most directional thing you have. Whatever you gild is where the eye goes first.
So gild on purpose. A gold rim on the frame around your photograph pulls attention to the photograph; gold scattered evenly across the background pulls attention to nothing.
Two or three small placements are plenty. If you find yourself adding a fourth, take one away from somewhere else instead.
Rule 4: layer lace over plain, not over pattern
Black lace on a black damask is the trap everyone falls into once. Both are fine-detailed and roughly the same value, so the lace disappears into the damask and you have spent a layer on nothing.
Lace needs a quiet neighbour. Lay it over a plain ground, or over an aged cream paper where its edges can actually be seen, and it turns into the Victorian texture a gothic scrapbook page is usually reaching for.
The same logic applies to toile, marbling and any small repeating print. One busy paper per area of the page, with everything else kept plain underneath.
Rule 5: age a paper with a blendable, not a brush
A blendable is a cluster with feathered edges that fade out rather than stopping at a hard line. Drop one at 40 to 60 per cent opacity across a corner and the paper underneath looks older, softer and less like a flat digital fill.
Blendables also solve the problem of where a gothic scrapbook page ends. A lace band or a holly garland running off the edge of the sheet makes the layout feel continuous, rather than like a rectangle of decoration floating in the middle.
Use them under your elements, not over them. A blendable on top of a frame fogs the very thing you wanted sharp.
Rule 6: check a dark gothic scrapbook page on a second screen
This is the rule most of us skip, and it is the one that costs. Dark layouts look different on every panel they land on, and your own screen is the one flattering the page most.
Open the finished page on your phone at low brightness. If the raven has vanished into the ivy, brighten that one element on its own layer rather than the whole page, because lifting the brightness of everything will grey out the ground you worked so hard to keep deep.
If the page is heading for print, expect a dark sheet to come out heavier and flatter than it looks backlit. Leaving a little paper texture visible in the darkest areas gives the ink somewhere to go.
A worked example: one gothic scrapbook page, built in order
The six Gothmas kits, built around bottle green, oxblood and tarnished gold.
Here is the order I build a gothic scrapbook page in, using the papers and cut-outs from my own Gothmas bundle as the example. Any dark kit you already own will follow the same sequence.
Start with the ground. A bottle green damask fills the whole 12 x 12 inch sheet, and nothing else touches the background from here on.
Add the frame next, before any greenery. An ornate black arch with a tarnished gold rim goes slightly off-centre, which leaves one side of the page free for layering.
Then the botanicals, coming in from one corner. Hellebores and a mistletoe sprig tuck behind the frame edge so the arrangement looks like it grew there rather than being posted on afterwards.
Hellebores are worth knowing about if you are choosing your own. They flower in the middle of winter, which is why the RHS growing guide files them as a midwinter plant and why they belong on a Christmas page more than a rose does.
Now the red. Three small berry clusters, no bigger than a fingertip each, spaced so they lead the eye around the frame.
Word art goes last, and it goes small. A plaque reading Merry & Macabre at the base of the frame closes the page, and a blank label beside it leaves room to write the year in by hand.
That arch shape is borrowed rather than invented. Pointed arches and dark carved ornament came back into Victorian homes through the Gothic Revival, which is the same well these frames are drawn from.
Where to take it next
A gothic scrapbook page rewards restraint far more than a bright one does. Two patterns and one warm accent colour will carry a whole album on their own.
If you want the same mood without the Christmas, the rules transfer almost unchanged to dark academia pages, where the ground is usually ink or oxblood and the light comes from a lamp instead of a candle.
And if you would rather keep the season but soften the dark, the Victorian Christmas junk journal approach uses aged cream as its ground and puts the black into the ink and the lace instead.
Build one gothic scrapbook page with these six rules before you commit to a set. Once the palette and the gold placement are settled, the rest of the album follows the same recipe.
Types of journaling include diaries, gratitude notes, bullet journals, art and junk journals, commonplace books, reading journals, travel journals and prompt-led writing. Choose by what you want to put on the page: a memory, a plan, a picture, a saved idea or a story.
To try one today, use a notebook and pen. Pick a section below and make one entry. For a collage, add a paper scrap and glue. The sample pages are invented examples made for this guide, not customer journals or pages from a paid game.
If game-style journaling appeals, our solo journaling RPGs are printable games you play in your own journal.
The daily diary
A diary is a place to record your days and thoughts. Try it if you want to write about your own life. Start with the date and one thing you noticed. Add what you thought about it, if you wish. You can write about a quiet day, skip dates or return after a gap.
Tuesday · Diary sample
Rain on the walk home. I waited under the library porch and watched the water drip from my bag.
I might leave a spare bag by the door.
Invented entry: a small event, then a thought. A full account of the day is optional.
Gratitude journaling
Use this page to note something you appreciate. It could be a person, a meal, a place or a small act. Try one item and add a detail about why you chose it. There is no need to fill a fixed list for this exercise.
Tuesday · Gratitude sample
Glad of: the library porch.
Why: it gave me a dry place to wait while the rain passed.
The same imagined day, with attention on one thing appreciated.
If you keep naming the same thing, you could add a new detail or leave the entry short.
Bullet journaling
The Bullet Journal method uses short entries and symbols to mark tasks, events and notes. Its official rapid logging guide explains the symbols: a dot for a task, a circle for an event and a dash for a note. Rapid logging means writing brief entries in this form.
Try it if you want a page for things to do as well as things that happened. Here is a small sample, not a full setup for the method.
Tuesday · Short log sample
• Return library book (task) ○ Walk home in rain (event) – Bag needs to dry (note)
Invented entries with labels beside the symbols. The official guide covers task updates and copying unfinished tasks to a later list.
Art journaling and junk journaling
For an art journal page, try drawing, paint or collage, with as much text as you want. For a junk journal page, try saved scraps such as an envelope, a ticket or wrapping paper. These approaches can share a page.
Start by placing one scrap on a blank page. Leave a space beside or below it for a date and a line of writing. Move the scrap until you like the layout, then glue it down. Keep the notebook page in place.
Place a paper scrap here Example: a piece of an old envelope
Date: Tuesday
Writing space: This blue reminds me of the library door.
Layout diagram, not a photo of a finished page. The dashed box marks a scrap; the text below shows where a caption can go.
The commonplace book
Use a commonplace book to collect ideas and passages you want to keep. To try it, copy a short line from something you are reading. Add the author, title and page number, or a link for a web source. Put your own thoughts below the copied words so you can tell them apart.
A simple page could have four labels: Topic, saved line, source, my note. If you want to find entries by topic, number the pages and list those topics at the front. You can add that list later.
The reading journal
Use this to keep notes about books. You might track titles, write reviews, give ratings or record thoughts as you read. For a first entry, write the title and where you stopped. Then add one thing you noticed or a question you have.
Invented sample: “Book: The Blue Gate, a made-up title. Stopped at: chapter two. My question: why did the visitor leave the key behind?” You can return to the question on a later page. Finishing the book is optional for this exercise.
The travel or memory journal
Choose an outing, a place or an occasion you want to record. Add a date, a place name and one detail. You could include a photo or ticket, or just write a caption. Write during the trip or when you get home, as you prefer.
Invented sample: “Tuesday, library steps. We waited for the rain to ease. The blue door was propped open.” If a detail is uncertain, mark it as uncertain rather than filling the gap with a guess.
Prompt-led writing and journaling games
A prompt gives you a subject or question to write about. Try one if you want a starting point. A journaling game adds rules for play; check the chosen game’s materials and instructions before you begin. A prompt on its own does not need a game.
Prompt: A letter waits under the library door. What is written on the envelope?
Sample response: Only my street name, in green ink. I turn it over and find a sketch of the porch.
Original fictional exercise, not a scene or rule from an Artful Safari game. Write your own response and stop when you have answered the prompt.
Pick what you want to save today. For a moment from your life, try the diary or memory page. For a plan, try a short log. For paper and pictures, try the collage layout. For reading, choose a book note or a saved passage. For fiction, answer the letter prompt.
After one entry, ask whether you want to make another like it. Keep the format, change the prompt or try a different page. You can mix these ideas in the same notebook.
Put the same photo on two papers before you add any other detail. Keep the photo the same size and in the same place. Choose the paper that makes the part you care about easy to see. If you prefer a busy paper, try a plain border behind the photo.
You can do this with loose prints, or with layers in a digital page. Start with papers you already own. The examples below use two released Forest Bark papers and one public-domain photo.
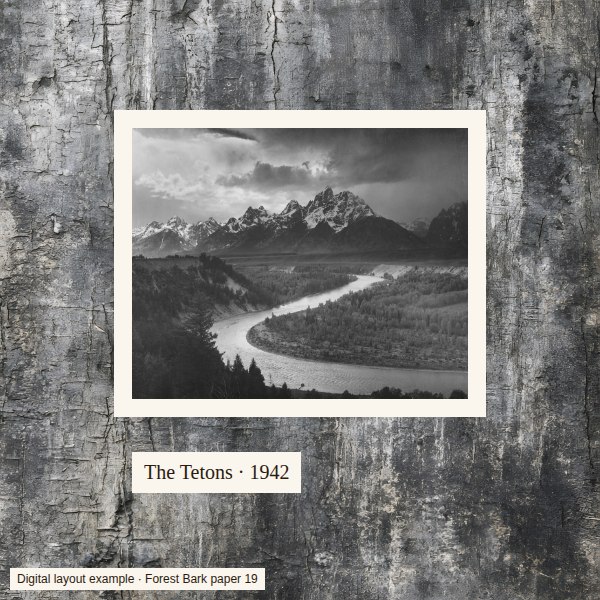
These are digital layout examples, not printed tests. The photo, its size and its place stay the same in all three. Only the paper or the cream border changes.
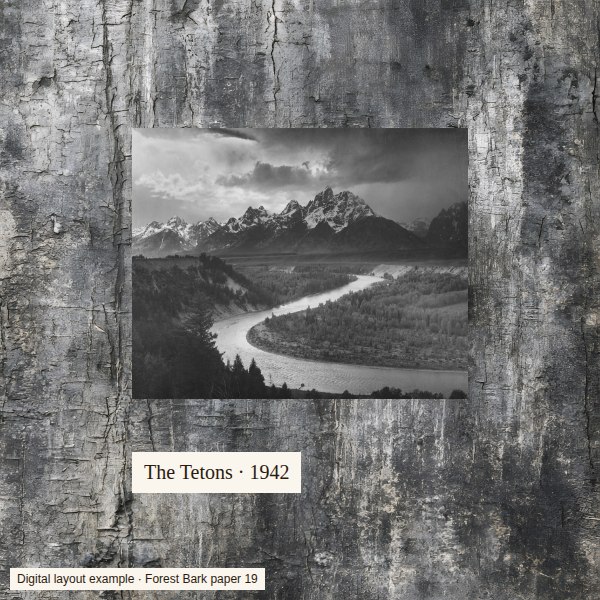
A. A detailed paper without a border
Forest Bark paper 19 has light and dark marks across the page. Compare those marks with the dark trees along the photo’s lower edge.
The bark adds detail around an already detailed scene. The photo is still visible, but its dark lower edge meets more dark marks. If your eye keeps moving to the bark, try the next version.
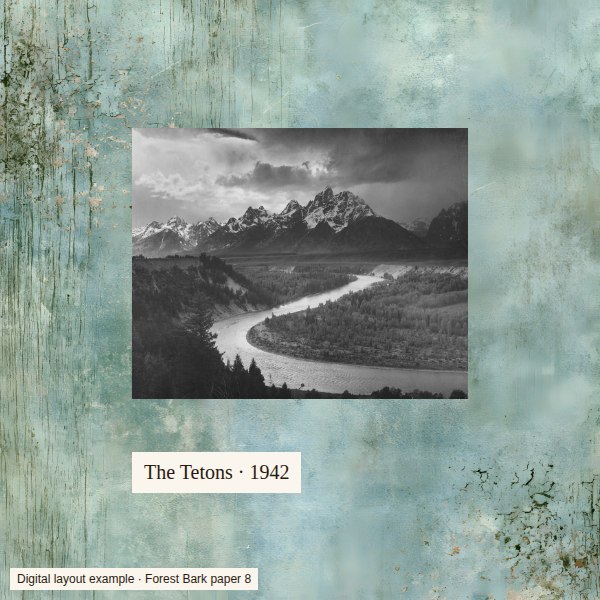
B. The same photo on a softer paper
Paper 8 has a pale blue-green centre. The photo’s dark lower edge stands apart from that lighter area.
This sheet has less detail next to the photo. It is one option when you want a clear edge without adding a border. A plain sheet could serve the same purpose.
C. Keep the detailed paper and add a mat
A cream mat separates the photo from paper 19. The photo itself has not been made larger.
A mat is a piece of paper, or a digital shape, behind a photo. It extends past the edges to form a border. Here, cream gives the photo a clear edge on all four sides. Try a dark mat too if cream draws more attention than you want.
The paper numbers refer to the file names in the Forest Bark square paper set. Photo: Ansel Adams, The Tetons and the Snake River, 1942. The USGS source identifies it as public domain. It is used here to show layout choices and is not included in the paper kit.
Try the comparison with your own photo
Pick the part you want people to notice. It might be a face, a view or a small detail.
Place the photo on two papers. Keep its size and position fixed so you can judge the paper change.
Look at the photo’s edges. Does a dark edge merge into a dark patch? Does a pale edge disappear against a light sheet? Try another area of the paper or add a mat.
Add a short note on a plain patch. In the examples, the date sits on cream. Check that you can read your words at the size you will view or print the page.
Choose before you glue or export. Look at the whole page, then check the photo and writing up close.
Colour and pattern are choices, not rules
A bright paper can suit a bold page. A plain background can be a finished choice. A straight strip or an even split between two papers can work too. Choose the version that makes the part of the photo you care about easiest to see.
For a colour photo, try one paper that repeats a colour in the image and one plain cream or grey paper. Compare them without changing the photo. These black-and-white examples show edges and texture; they do not test colour matching.
Use the square papers shown here
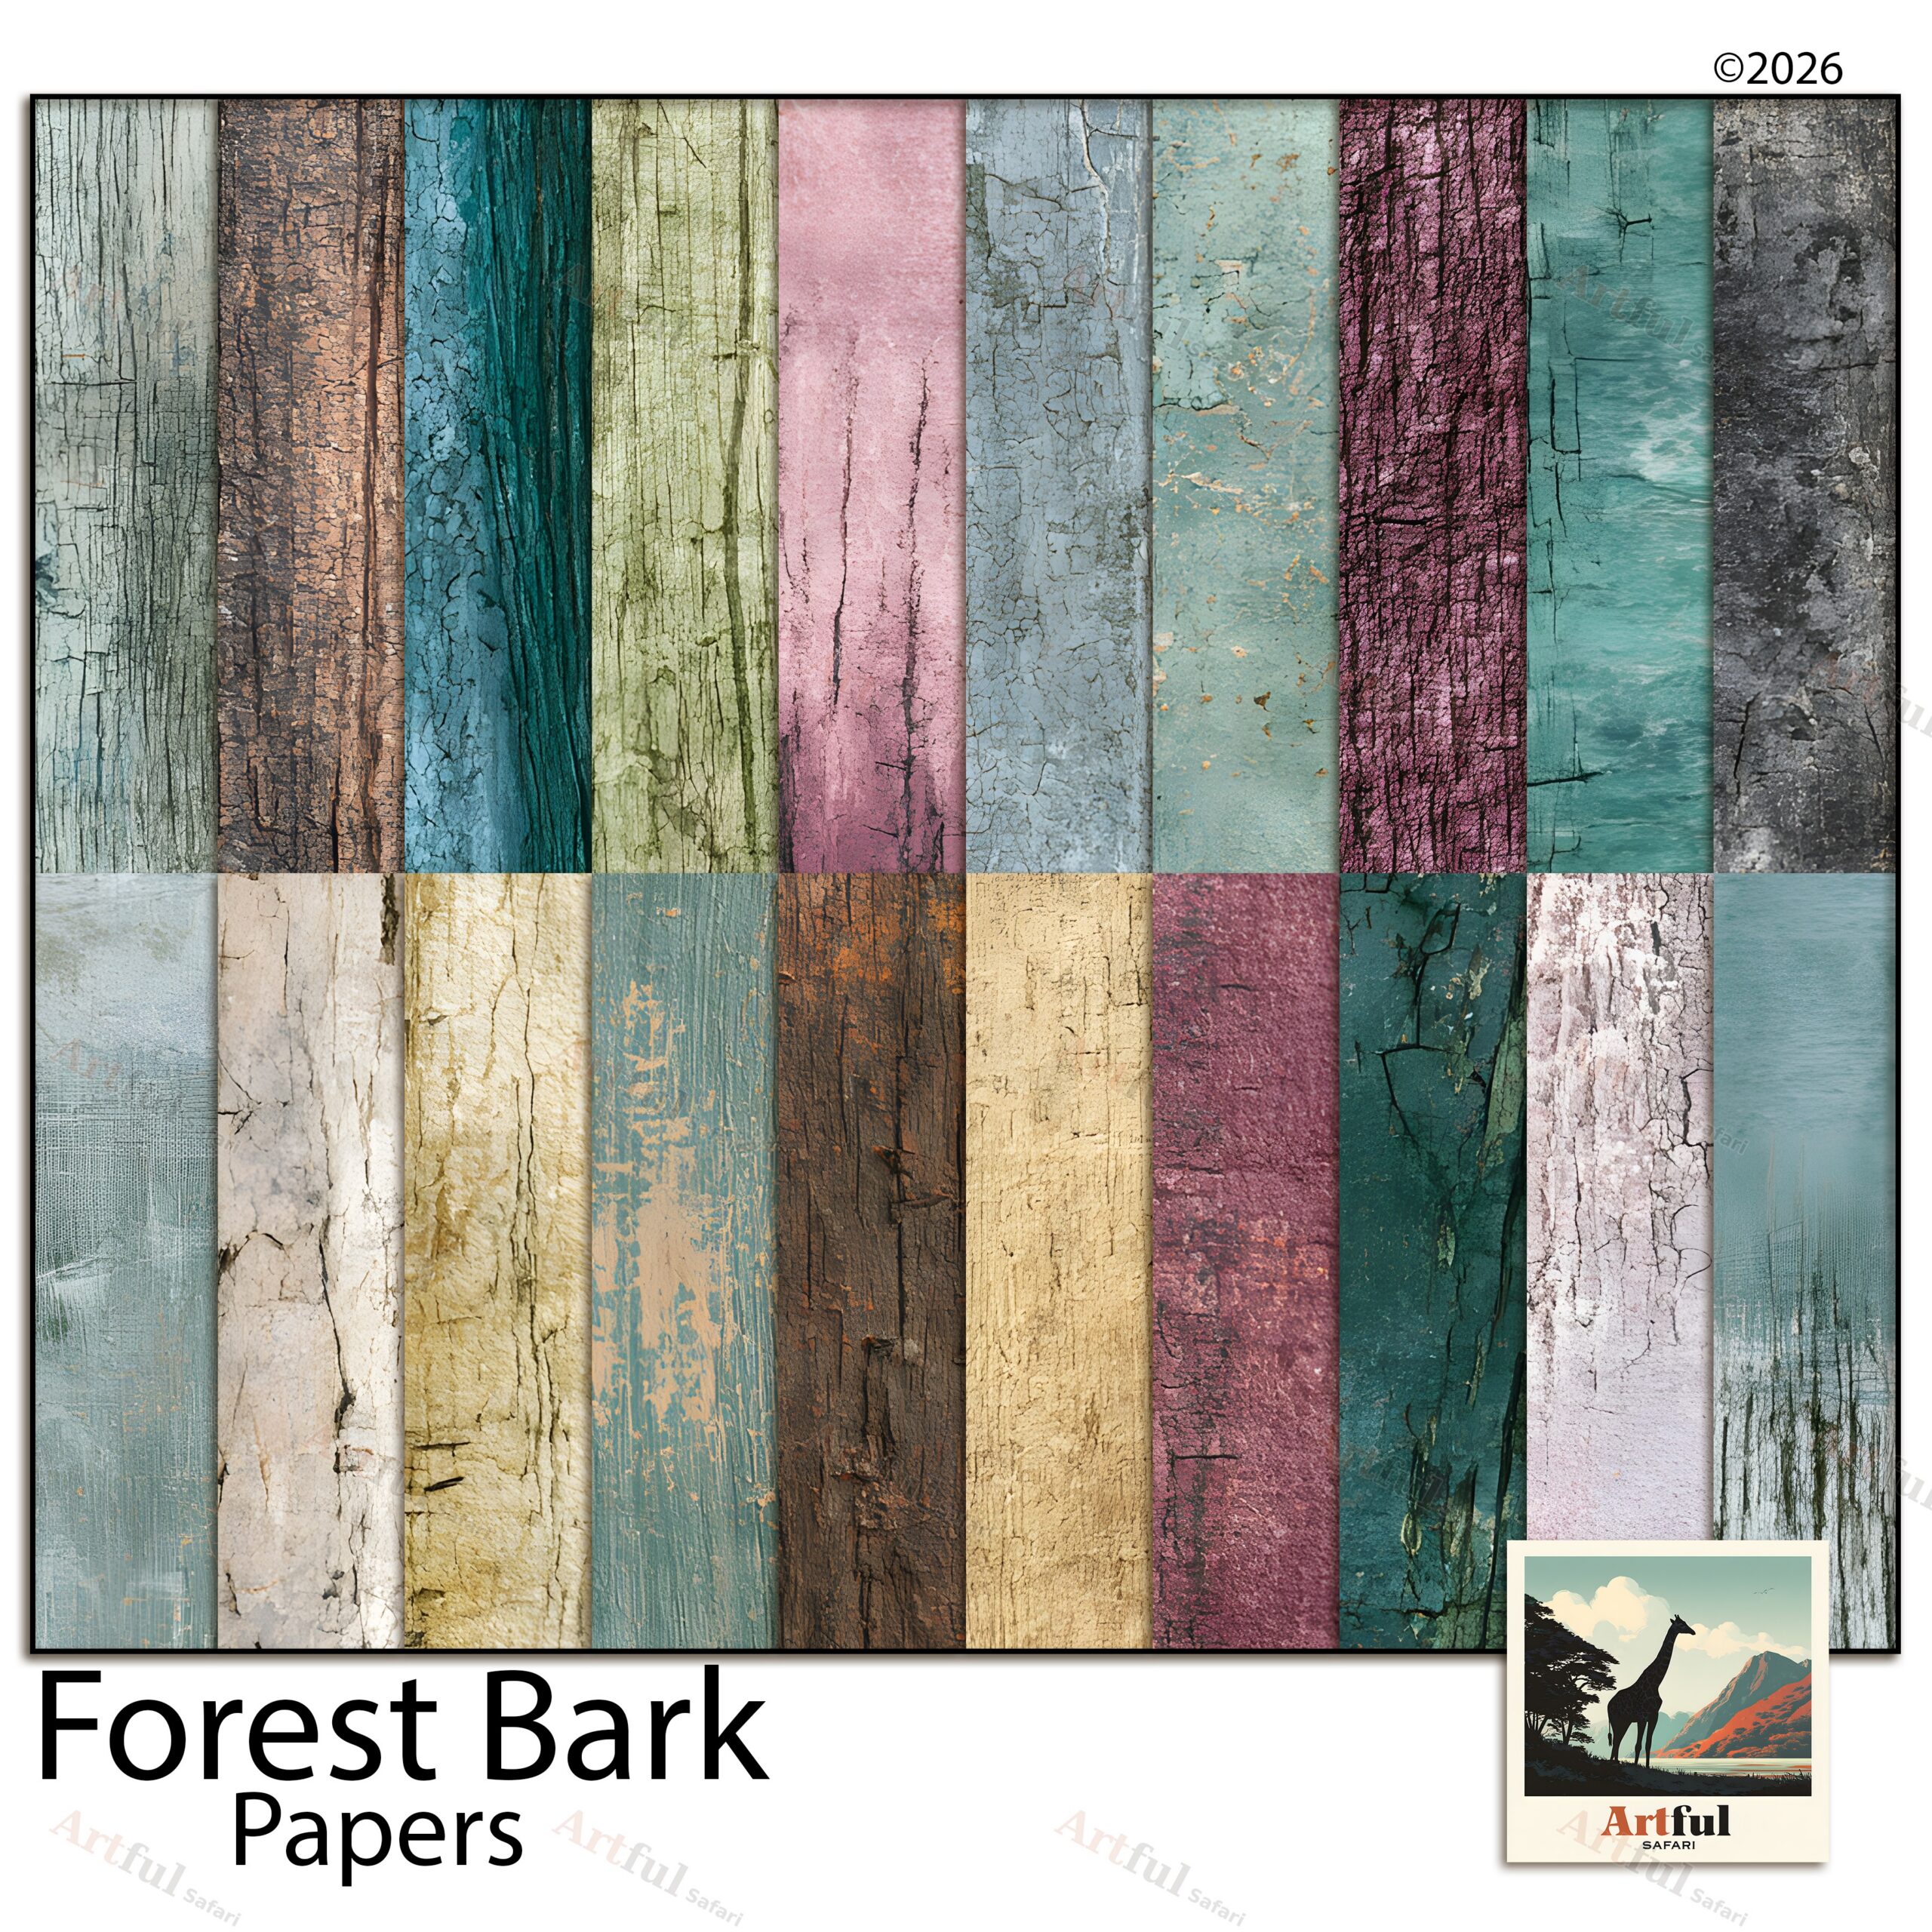
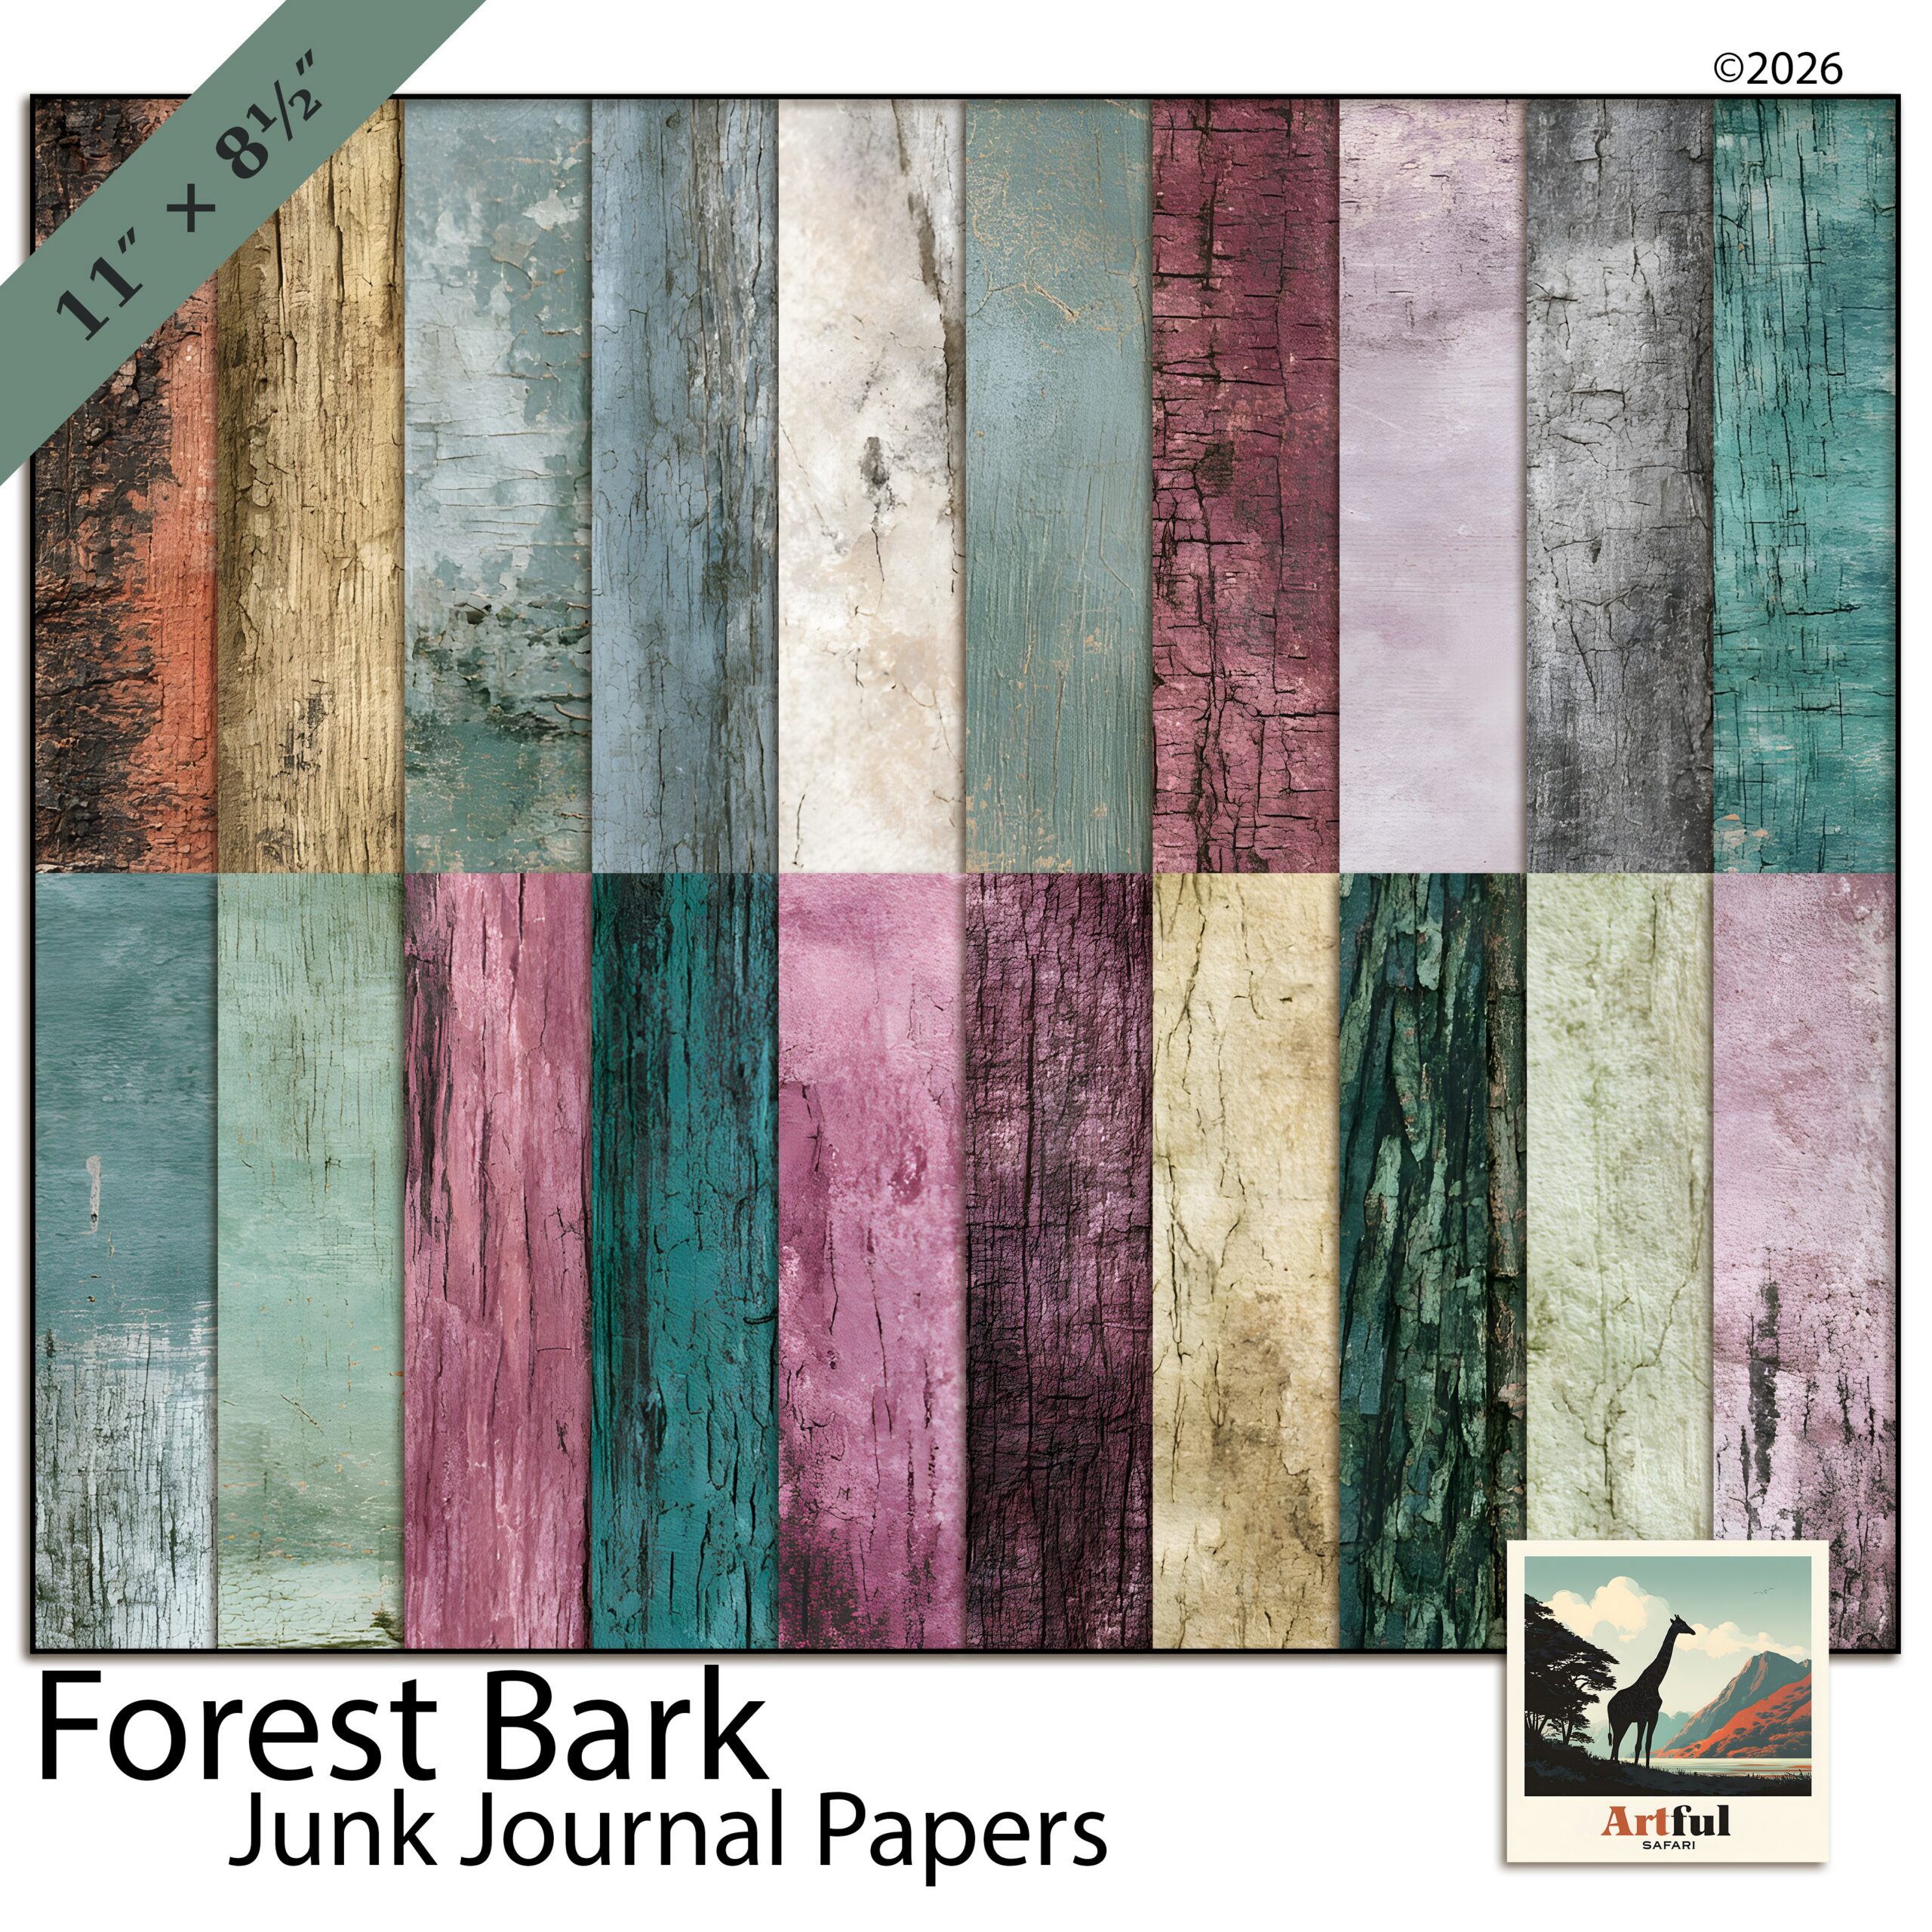
The Forest Bark square scrapbook paper kit contains 20 JPG papers at 3600 × 3600 pixels, sized for 12 × 12 inches at 300 DPI. Helene designs the papers. This is a digital download; no printed paper or sample photo is supplied. Check the product page for the current price and download details.
If you plan to print, a full 12-inch square will not fit on Letter or A4. Use the paper-size and print-settings guide to choose between fitting the whole design and keeping its intended size.
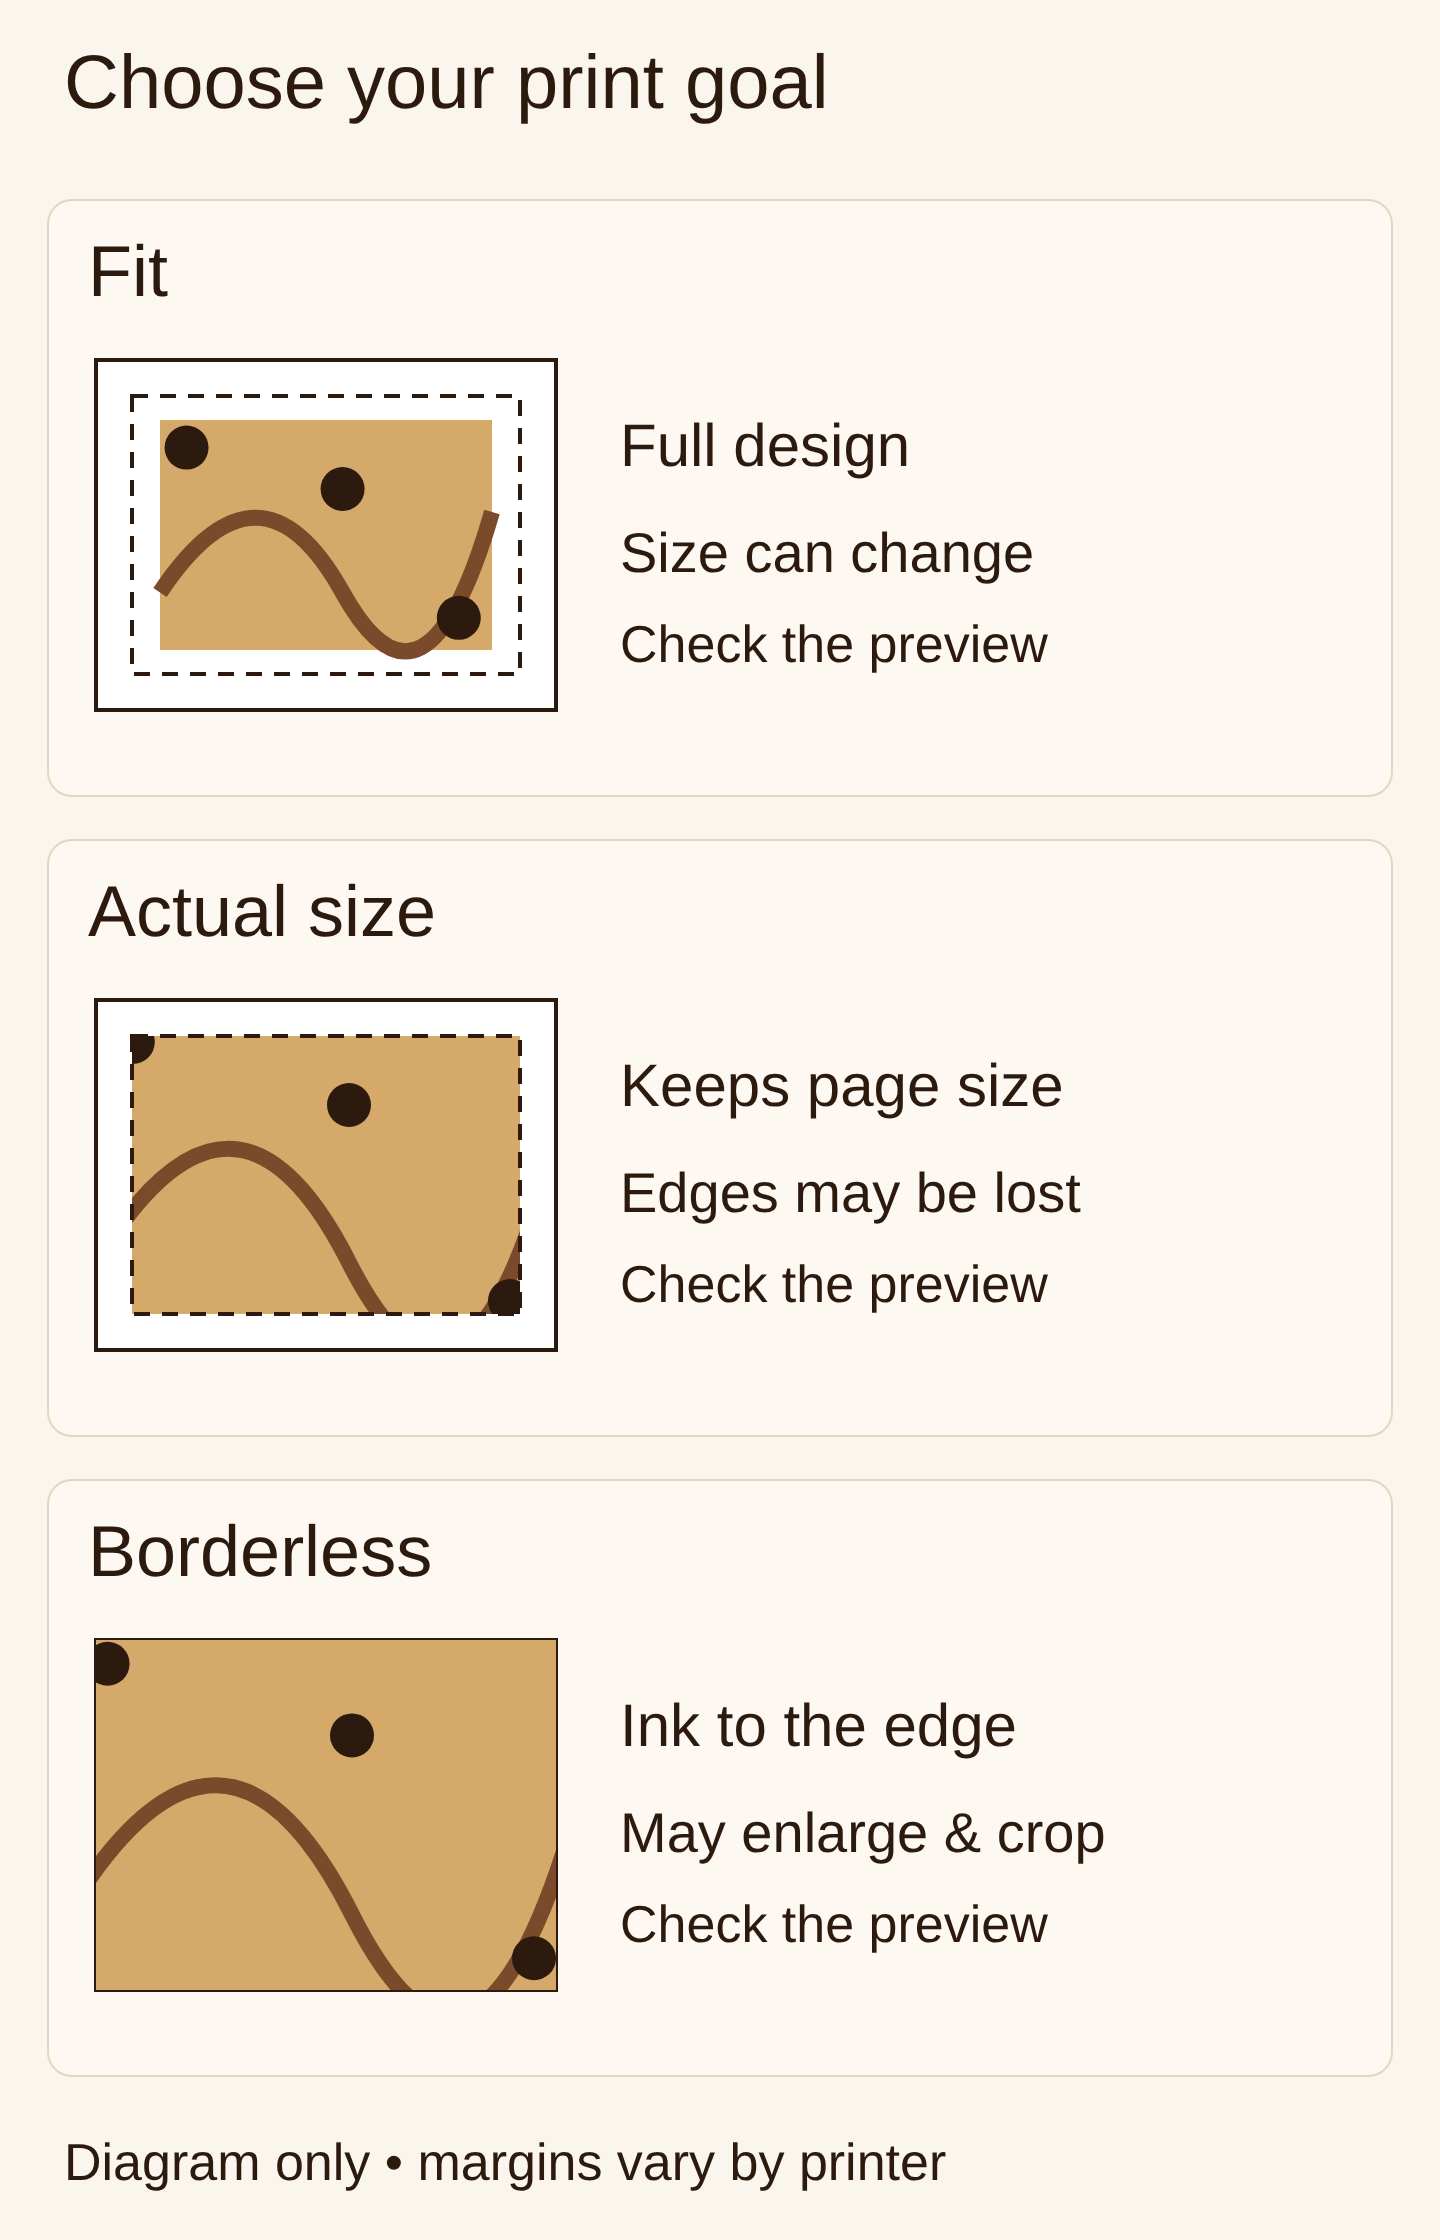
To print junk journal papers, first choose the sheet size in your print settings. Then decide what matters most: keeping the whole design, keeping its exact size, or putting ink right to the edge. Those are three different choices.
Actual size does not turn on borderless printing. It tells the app to keep the file’s page size. A printer that leaves a white edge can still leave one at Actual size.
This guide shows the choices with diagrams. They explain the settings; they are not photos of test prints or screenshots of a printer menu. Your printer may use different names for its controls.
Choose how to print your junk journal papers
Fit: keep the full page design
Choose Fit in Acrobat when you want the PDF page to sit within the space the printer can use. That space can be smaller than the sheet. The page may get smaller or larger, and white space may remain.
This is a useful starting point for a background you plan to trim. Check the preview before printing. A small tag or card can change size too, so Fit may be the wrong choice when a piece must match a set measurement.
Actual size: keep the file’s page size
Choose Actual size when size matters, such as a card meant to fit a pocket. Check that the file page fits your paper and that the parts you need sit inside the area the printer can reach.
Content that falls outside that area may be cut off. A square design will not become a Letter-shaped page at Actual size. Measure the test print before making more copies.
Borderless is a printer setting. Check your printer manual for the paper sizes and types that support it. Some printers offer it only for certain photo papers or sizes.
Diagram: the dashed line marks the area a printer can use. Its size varies by printer. Borderless needs support for the paper you load.
Printing to the edge is sometimes called full bleed. If your printer cannot do it, print with a white edge and trim it off. The sheet you keep will be smaller. To keep a set final size, you may need a larger sheet and a printer or print shop that can handle it.
A4 and Letter are different shapes
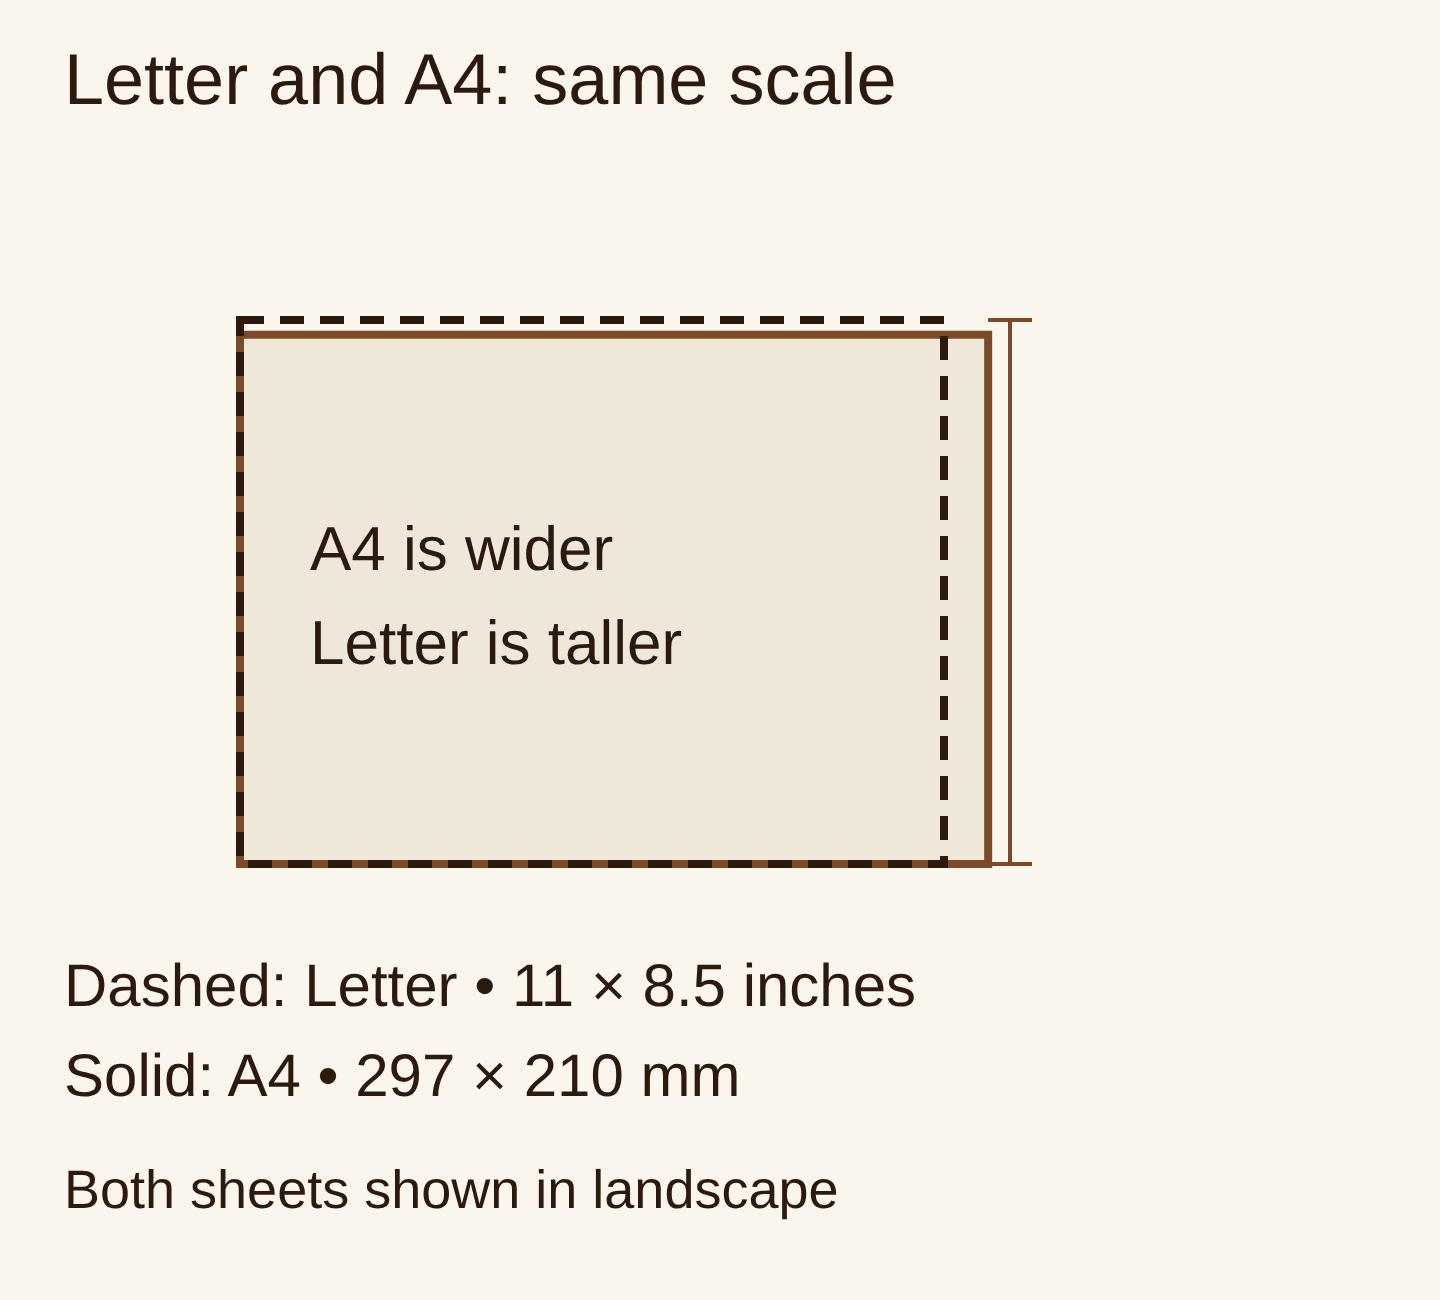
US Letter is 8.5 × 11 inches. A4 is 210 × 297 mm, or about 8.27 × 11.69 inches. Turn both sideways and A4 is wider and shorter than Letter. Adobe lists the dimensions in its A4 paper guide.
The outlines use the same scale. Neither shape can fill the other without space left over, a crop, or a change in shape.
Load the paper you have, then select that same size in the printer settings. If the file is Letter and the sheet is A4, use the preview to check what Fit or Actual size will do. Do not assume the small difference will leave every edge intact.
A square paper also needs a choice. You can fit the whole square on the sheet and trim the spare white space. Or crop the design to fill a rectangle, knowing you will lose part of it.
Check the file, not only the image’s pixel count
For a PDF, check the page size shown in the file or print preview. For a JPG, check the intended print size in the product listing and in the app you use to print it.
A pixel count alone does not set the printed size. For example, an image that is 3300 × 2550 pixels works out to 11 × 8.5 inches at 300 pixels per inch. A print app can still scale it. Check the size and crop shown in its preview.
Print one test page before the set
Use the downloaded file, rather than a shop preview image. If the kit gives you a PDF and you want to use the Acrobat controls above, open that PDF in Acrobat or Reader. A photo app or browser may offer different controls.
Load one sheet. Use a paper type your printer supports. Match the paper size and type in its settings.
Select one page. Pick a design with some detail near an edge so you can see whether anything is lost.
Choose your goal. Use Fit for the full design, Actual size for a set size, or supported borderless settings for ink to the edge.
Look at the preview. Check the direction of the page, the crop and the white space. Choose portrait or landscape to suit the design.
Print and check it. Let the ink dry as the paper maker advises. Look at the edges and measure any part that must fit a pocket or frame.
Test on the paper you mean to use for the journal. Its surface can change how the colours look. Check the printer’s paper-weight limit before feeding thicker stock.
If the test looks right, use those settings for the rest of the pages that share its size. Check again when the next file uses a different page size or shape.
Fix the result you see
There is a white edge. Check whether it is built into the design, left by Fit, or required by your printer. Actual size will not remove a printer’s margin. Keep and trim the edge, or check for a supported borderless option.
The edge of the design is missing. Check for Actual size on a page that is too large, a photo app’s fill/crop option, or borderless enlargement. Try Fit if keeping the full design matters more than its size.
A card came out too small. Check whether Fit shrank it. Try Actual size with a sheet that can hold the full page, then measure a new test.
The page faces the wrong way. Match portrait or landscape to the design. Check the preview again after changing the paper size.
Choose a texture for your next page
The Forest Bark junk journal papers are the texture set linked in this guide. Check the listing for the current files and page sizes, then test one page with the steps above.
Once the print is ready, use it under a photo or a piece of writing. Our guide to choosing a background paper shows what to look for when the pattern and photo compete.
A journaling game gives you a prompt, usually off a card or a die, and you write down what happened to a character you made up. You keep the writing in a notebook you own. Nobody is playing against you and there is nothing to win, and the rules are short enough to learn on the first night.
That last part is the bit people do not believe until they see it. The word most of these games carry on the cover is “roleplaying”, and for a lot of us that means a table of teenagers with strange dice in the early eighties.
What actually arrives is a book of prompts. The rest is a notebook you already have.
The crafters who found this in the past two months call it an RPJ, short for role playing journal. The word was coined on camera by the YouTuber Journals4breakfast, who took one look at the four-word official name and decided it was too many words. Her video is the fastest way to understand the appeal:
Table of Contents
What actually happens in a journaling game
You draw a card, or roll a die, or turn to the next numbered page. The game reads back a situation. You write down how your character met it, and then you close the book until tomorrow.
One card, one situation, one page. In a journaling game that is the whole loop.
Some hand you the situation as a card like the one above. Others give you a table of numbered results and a die to pick one. We pulled the parts apart in the complete guide to one quiet night.
How to choose your first journaling game
Most people who abandon a journaling game abandon it after printing, not after playing. Every entry below answers the same three questions, because those are the three that decide it: what it is, what you need, and how much writing an average night asks for.
The seven below are ordered by how little stands between you and your first page. The first two ask almost nothing. The last runs for a year.
1. Alone Among the Stars
What it is: you are a lone explorer visiting planets nobody has named, and each planet gets one entry. The whole ruleset is about four pages.
What you need: a pack of playing cards, one ordinary six-sided die of the kind in a board game box, and a notebook.
How much writing: as little as a few lines per planet. Takuma Okada says a game runs from a few minutes to several hours, so this is the journaling game you can reach a real ending in tonight. It is name your own price, so the download works with the price set to nothing.
2. The Sticker Game
What it is: a story told through 41 short audio tracks, where you answer with stickers rather than sentences. Cassi Mothwin built it as an audio drama you play along with.
What you need: headphones, a notebook, and the stickers already in your drawer. The rules ask for more than twenty and then tell you not to go and buy any, which is a sentence worth reading twice.
The stash finally gets a job. Most of these ask for what you already own.
How much writing: barely any, which is the point. It runs to roughly one to two hours, making it the other journaling game here you can finish in an evening. It is $12.99 USD or more.
3. Apothecaria
What it is: you are the witch in a small village and people keep turning up with ailments. You gather things, you brew something, you write down whether it worked. Anna Blackwell describes the tone as Studio Ghibli by way of Stardew Valley.
What you need: a pack of playing cards including the jokers, a journal, and something to write with.
How much writing: a session runs about half an hour, and it is built to be played over months rather than finished. Shannon Green set hers up inside a gutted hardback and filmed it:
What it is: a journaling game set inside one endless castle, and you walk through it room by room. Nich Angell’s own words: a solo rulebook that “throws prompts and moments at you, and you must decide how your character reacts while recording your adventures in a journal”.
What you need: the rulebook, a pack of playing cards, and a blank journal.
What it is: the journaling game here that is not fantasy at all. You are a bounty hunter taking a contract in the middle of a war between six factions, and it reads like a western that happens in space.
What you need: two ordinary six-sided dice and a notebook. That is the entire kit.
How much writing: your choice, because Jason Price built two ways to play it. There is a quick mode and a slower Story Mode for people who came for the journal. It is $10 USD or more, and we have six ways to journal a bounty hunt.
What one night of a journaling game looks like on the page
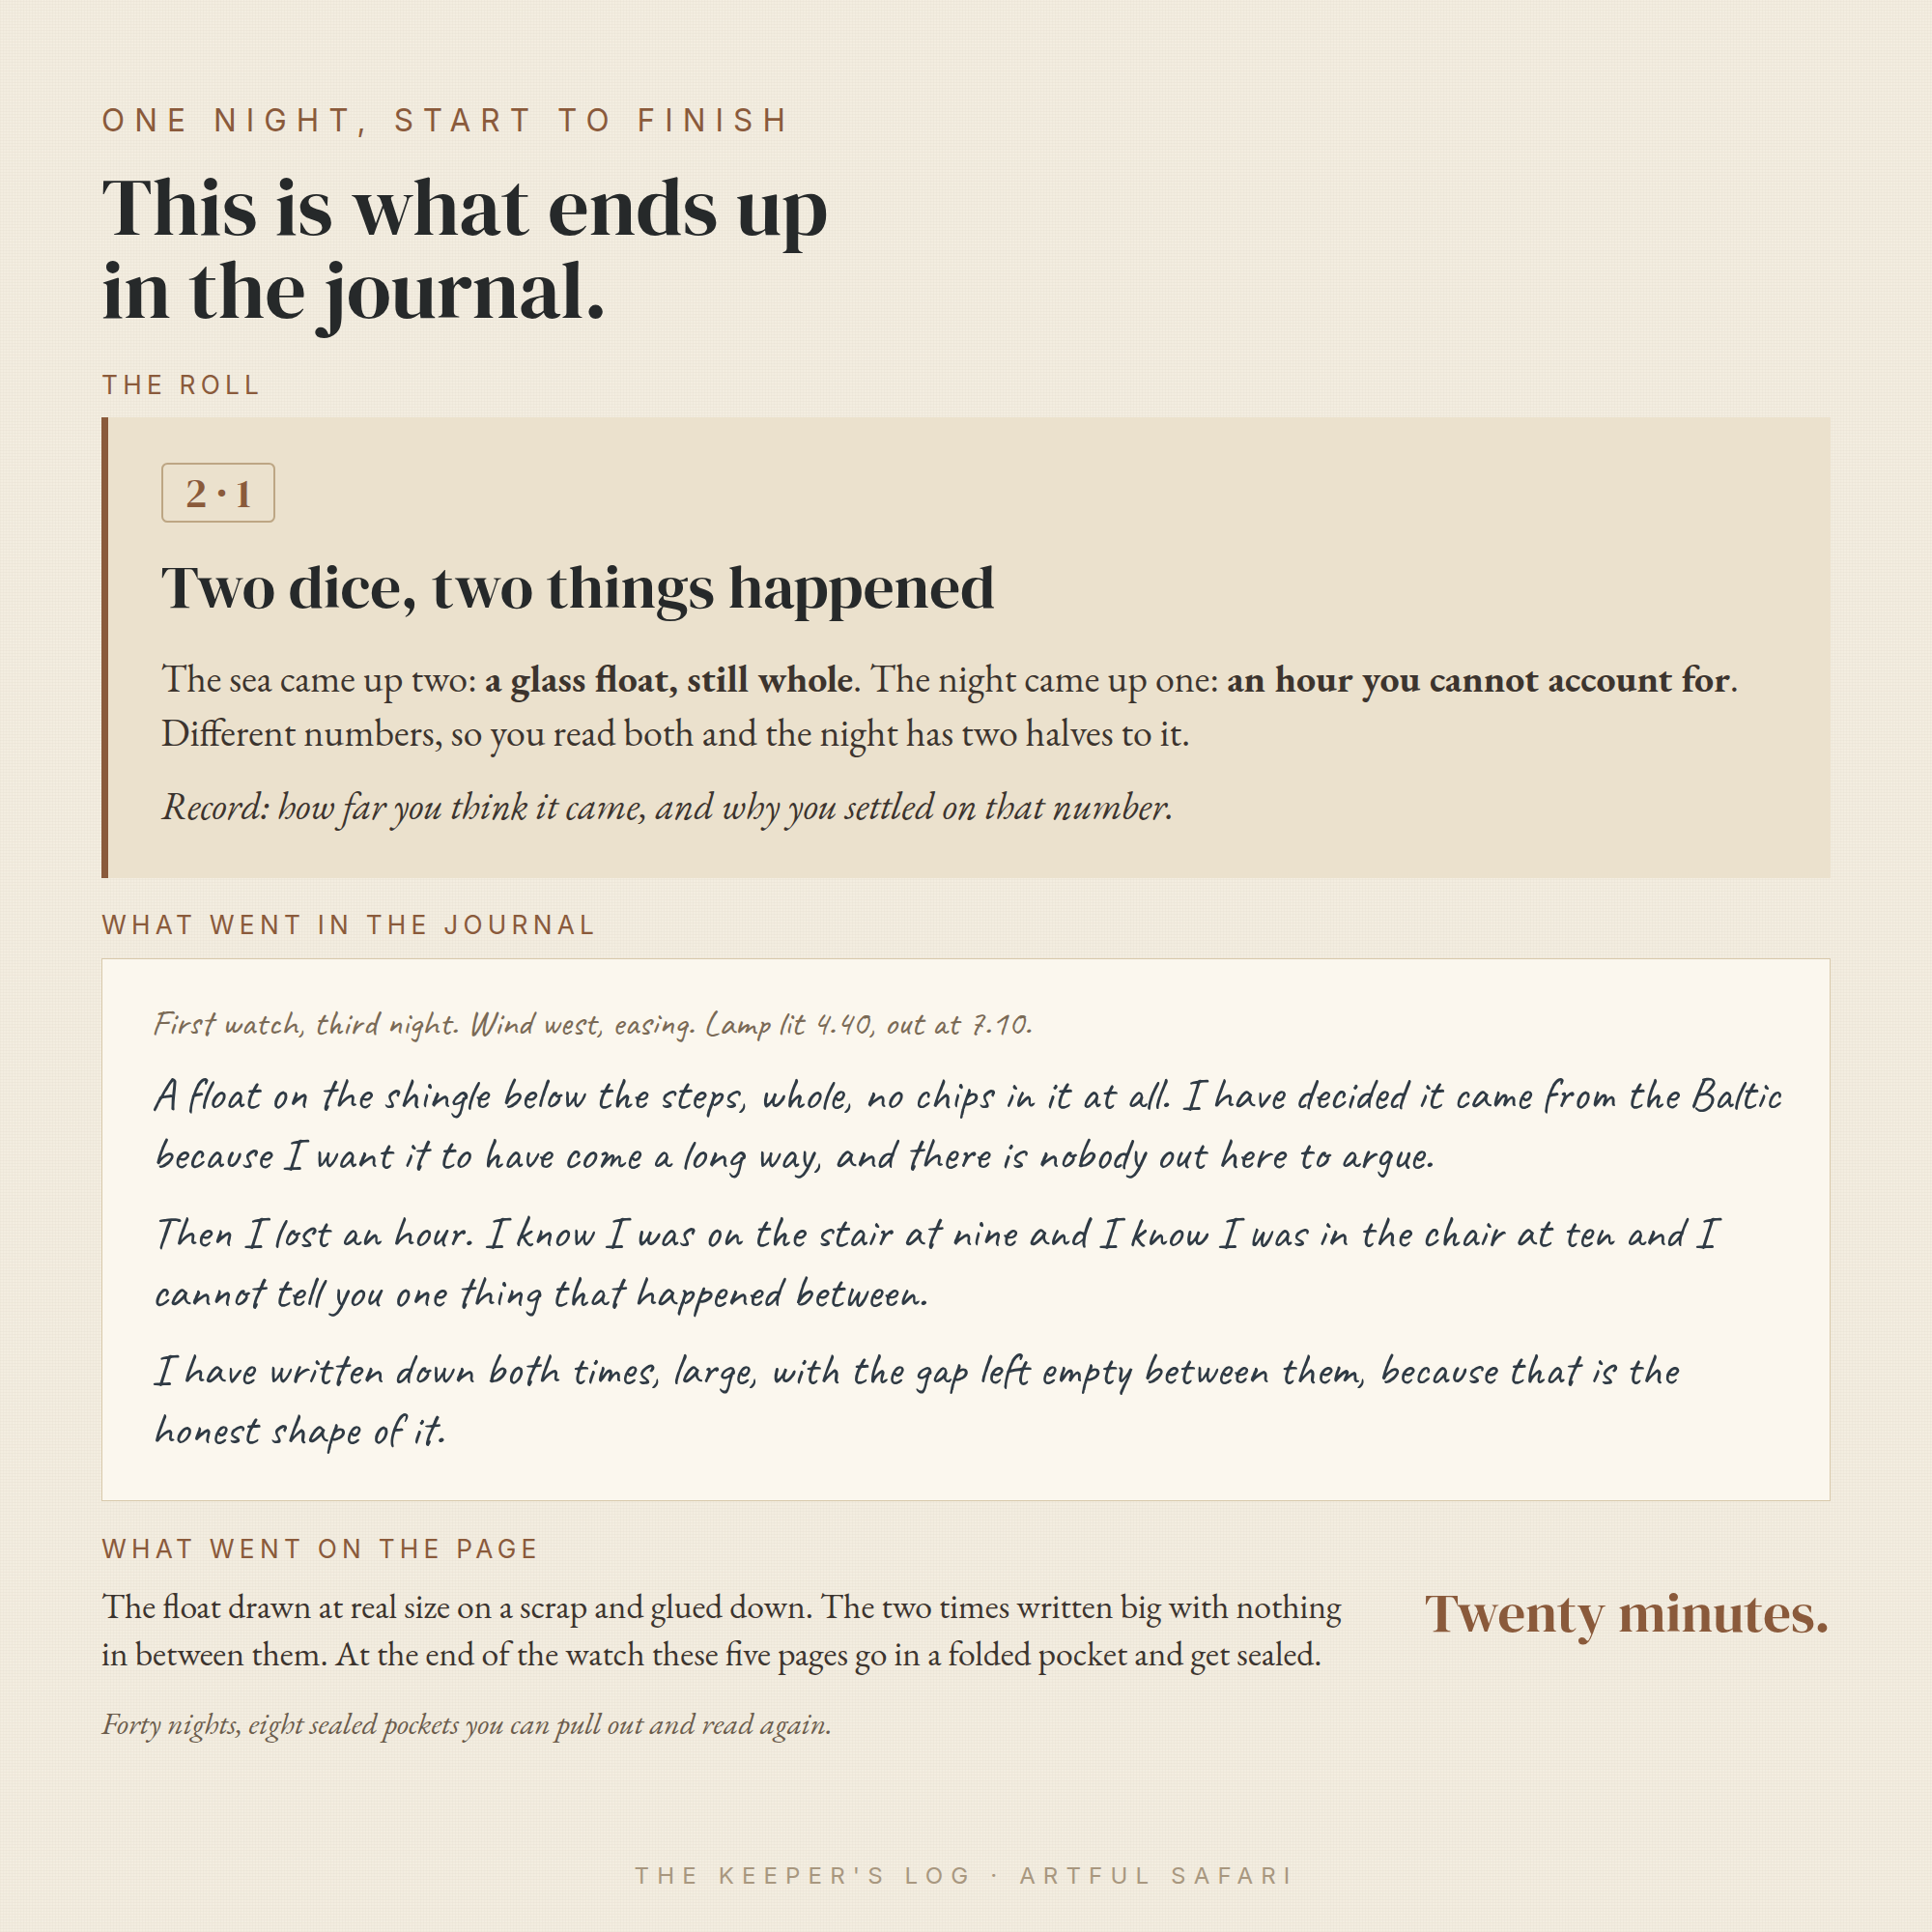
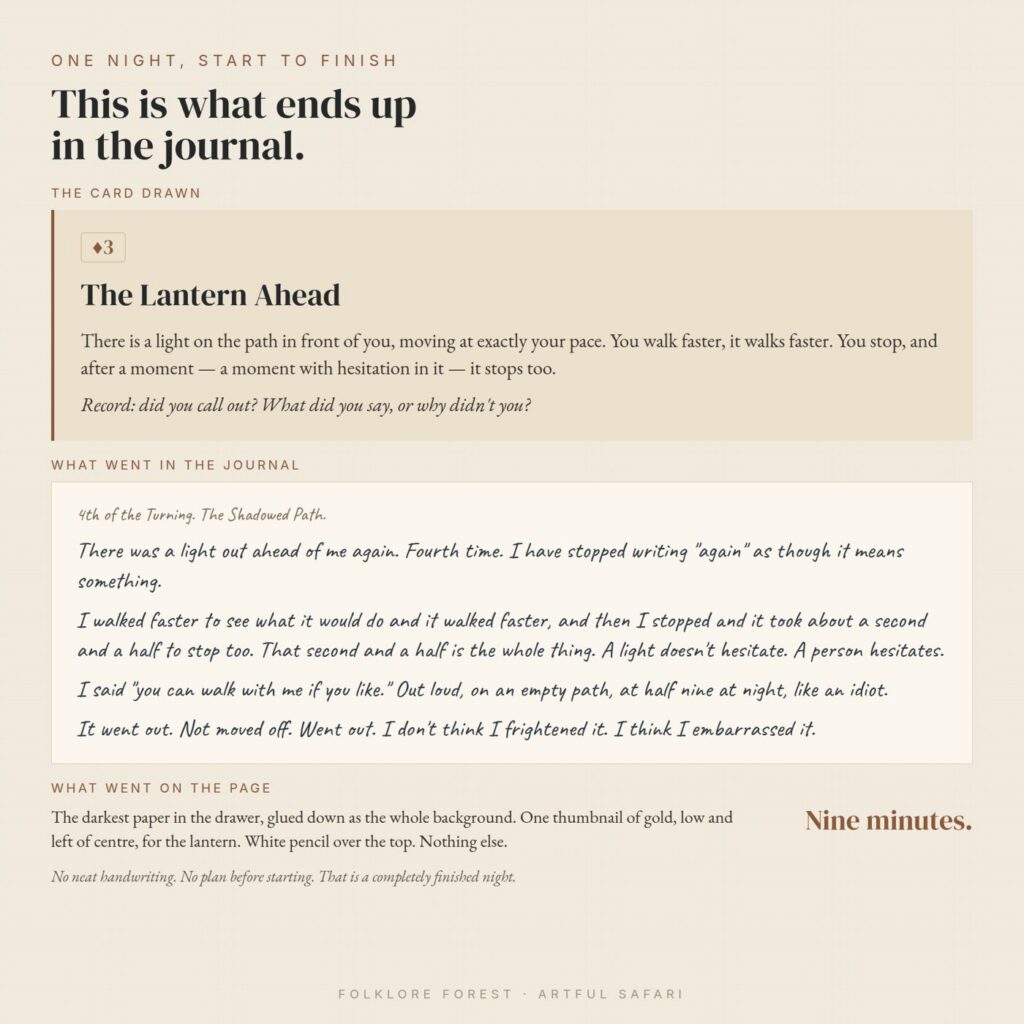
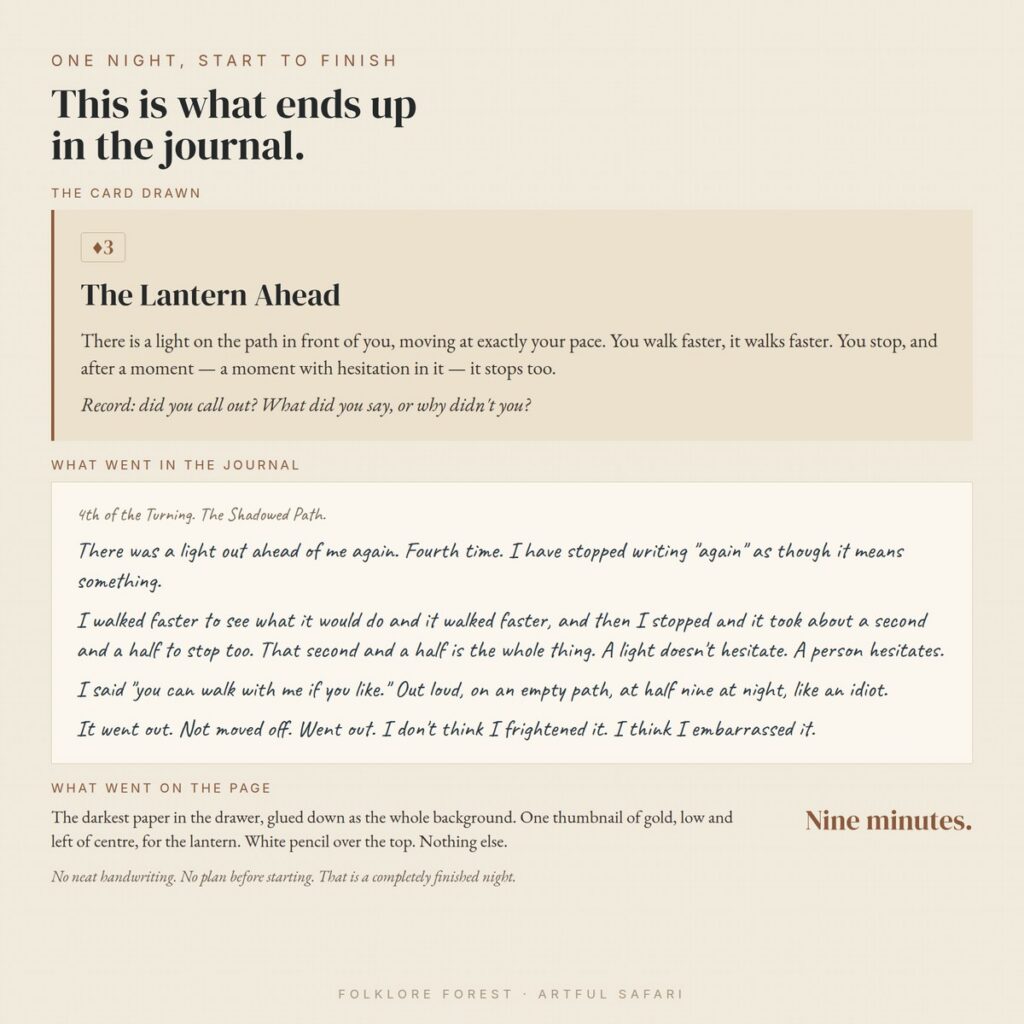
Almost nobody shows this part, which is why it stays mysterious. Here is one real night: the card that came up, and what went into the journal underneath it.
Nine minutes, in handwriting nobody would call neat. That is a finished night.
Look at what is missing. There is no essay and no plot worked out in advance, just five short paragraphs and a piece of dark paper glued down behind them.
6. Ironsworn
What it is: you swear a vow you cannot easily keep and then go and keep it, in a cold landscape of forests and violent seas. It is the heaviest book here at 270 pages, and it is free.
What you need: one ordinary six-sided die and two ten-sided ones, plus a notebook. Ten-sided dice come in any cheap dice set.
How much writing: more than the first five, because vows carry across sessions and you need a record. This is also the only journaling game here you do not have to play alone: Shawn Tomkin designed it for solo, co-op and guided play. Our six steps to a first session walks through the first vow.
7. Koriko: A Magical Year
What it is: a teenage witch spends a year away from home in an unfamiliar city. Jack Harrison wrote it as a slow year across six volumes, with a pause between each to write a letter home.
What you need: a tarot deck, some dice and a journal. It says outright that no previous experience is needed.
How much writing: the most here. Each volume takes one to two hours and a full playthrough runs six to twelve, which makes it the journaling game that genuinely fills a notebook. It is $18 USD or more, and we have five ways to keep a Koriko journal worth finishing.
Where to find a free journaling game
Two on this list cost nothing and there are dozens more. Most live on itch.io under name-your-own-price, so the download works with the price set to zero and the creator takes whatever you pay later.
The book you write in matters more than the game you write about.
Shannon Green went through twelve free ones in one video and showed how to print them so they fold into a booklet rather than a stack of loose sheets:
Wikipedia’s entry on solo role-playing games covers where all this came from, if you want the history before you spend anything.
Journaling game questions people actually ask
What is the journaling part, exactly? Am I writing like a novel, or making notes?
Either, and most people end up doing both in the same book. Plenty of entries in a journaling game are a paragraph written as the character, in first person, the way a diary reads. Others are a bulleted record you can look up in three weeks.
Is there a journaling game with less writing and more game?
Yes, and The Sticker Game is the clearest one, because you answer with stickers rather than sentences. Notorious has a faster mode built in for the same reason. As a rule the dice-driven games ask for less writing than the card-driven ones, and both ask for less than a season-and-letter game like Koriko.
Can I draw, glue and decorate in it, or does it have to be words?
Decorating is how most of this audience plays and no game forbids it. People press cuttings into Apothecaria and glue printed game pages into gutted hardbacks. If you already junk journal you are ahead of someone arriving from tabletop gaming, because the hard part for them is making the book look like anything.
Frames give a written entry somewhere to sit without you planning the page first.
Do I have to play a journaling game on my own?
No. Ironsworn runs the same rules for one player, a pair, or a group with someone moderating, and Alone Among the Stars is written for one or more players. The rest assume one person because that is what they were designed around, though nothing stops two people keeping parallel journals from the same prompts.
Is there one long enough to fill a whole notebook?
Koriko is the one here built for it, at six volumes and a whole in-game year. Apothecaria also runs long, because it is written as an ongoing village rather than a story with an ending. Either will still be going next spring.
What does a journaling game cost?
Free to about eighteen US dollars, and two on this list cost nothing at all. The very small ones sold on Etsy and itch.io tend to sit nearer five. The notebook is usually the bigger spend, and plenty of people use one that was already in a drawer.
Which one to open first
If you have never played anything, set Alone Among the Stars to nothing and write one planet tonight. If the book is the draw rather than the story, start there instead and read how to build one for a solo game, or work through your first seven nights, one at a time. Both routes end in the same place, which is an RPJ you keep.
And if a journaling game about a lighthouse keeper on a coast that keeps sending things ashore sounds like your kind of thing, The Keeper’s Log is ours: two dice, forty nights, and every rule on page two.
The best solo rpg for most people is a solo journaling game: a small book of prompts and tables you answer in a notebook of your own. Nobody else has to be free that evening. Eight of them are below, ordered from the shortest first evening to the longest, with what each one costs, what it asks you to write, and who it is wrong for.
Four things decide whether a game survives its first night on a real kitchen table. What it costs. What you have to go and find before you can start. How much writing it expects. And the kind of evening it actually produces.
Every price and every component list below comes off the publisher’s own page, read today. Where a publisher says nothing about how long a session runs, I have left the number out rather than guessed at one.
The craft side of this hobby calls these games RPJ, short for role playing journal, a word the YouTuber Journals4breakfast coined for her own channel. If you want the longer explanation of what an RPJ is before you spend anything, that is covered here.
Every best solo rpg on this list writes into a book you already own.
What you need before you pick one
A book to write in, and a pen. That is the floor for every best solo rpg here, and the book is meant to be one already sitting in your stash rather than something new.
Past that, three of them want an ordinary deck of playing cards, four want six-sided or ten-sided dice, and one wants a tarot deck alongside a stack of dice. If your book is a made one rather than a bought one, this is what a junk journal is, and this covers printing papers at home.
Before you spend anything, it is worth watching somebody turn the pages of a finished one. Andrea’s flip through of the chronicles of Alva shows what a stack of those evenings looks like as an object:
The 8 best solo rpg picks, ordered for a first evening
1. Alone Among the Stars, the smallest one here
You fly between planets and write down what you find on each one. Takuma Okada’s page asks for a standard 52-card deck, one six-sided die and a small journal, and it is name-your-own-price, so you can pay nothing.
The die tells you how many cards a planet holds; each card you turn over is a discovery, and you write a few sentences about it before turning the next. Its own listing puts an average session at a few minutes, which makes it the best solo rpg to try if you suspect you will hate the whole idea.
Wrong for you if you want a story that builds. There is no plot waiting at the end, only places. Alone Among the Stars on itch.io.
2. Last Tea Shop Classic, free and one page long
You keep a tea shop on the border between the living and the dead, and the recently deceased stop in for one last hot drink. Spring Villager asks for an hour or so of quiet time, pen and paper, one or two six-sided dice, and tea, which the page marks optional but recommended.
Dice send you a visitor and set the weather. You brew something from what is in the cupboard, ask about their life, write down what they tell you, and the game ends when a figure called the Veiled One arrives. The classic edition, in the publisher’s own words, will always remain free, which makes it the best solo rpg to hand somebody who does not want to spend a penny.
Wrong for you if death as a subject is not something you want in a journal this month. The page carries that warning itself. Last Tea Shop Classic, with a 16-page expanded edition at $5.00 or more.
Three of the eight cost nothing at all, so the best solo rpg for you may be a free one.
Shannon Green went looking for the free end of this shelf and came back with twelve of them, plus the printer settings that turn a download into a little booklet:
3. Apothecaria, the best solo rpg the crafters found first
You are the village witch of High Rannoc, mixing potions for whoever turns up at the door with Fairy Fever or Yeti Chest. Anna Blackwell asks for a deck of cards with the jokers left in, a journal, and something to write with. No dice.
It is $13.00 or more on itch, with a printed copy from her own shop, and the listing puts an average sitting at about half an hour. She describes it as a long-term game and says outright that rushing it is the worse way to play. That is why it has taken hold with people who spend a fortnight decorating a book before they answer a single prompt, and why it is the best solo rpg for a slow winter.
You are not a person in this one. You are a magical item, and you follow the hands it passes through over centuries while its keepers live and die around it.
Jack Harrison’s page at Mousehole Press puts it at $14.00 or more and calls it a great way to spend an hour sketching, world-building and storytelling in your own company. You pick from nine kinds of object, from a weapon to a deck of worn cards, then answer questions about each keeper and decide how much time passes while the item rests in the dark. If you would rather draw than plot, this is the best solo rpg on the page for you.
Wrong for you if you want to be the hero. Playing furniture is the entire point, and some people find that cold. Artefact on itch.io, with more on how it plays.
The blank first page is the part everybody stalls on.
5. Colostle, a deck of cards and no dice
The whole world is the inside of one enormous castle, and you explore it, on foot or in a giant suit of armour. Nich Angell asks for the book, a standard deck of playing cards and a notebook, and he calls it super simple and easy to play, for all ages.
Cards throw prompts and moments at you, you decide how your character reacts, and you write the result up as an adventure log. The digital edition is £12.00 and the 170-page hardback is £35.00 from his own shop, which makes it the priciest way onto this best solo rpg list if you want the paper one.
Wrong for you if you want to start tonight for nothing. It is a real book with real rules to read first. Colostle.com, and our first-journal guide.
6. Koriko, a year in six sittings
A young witch moves to a seaside city for her training year, and you write that year. Jack Harrison again: you need the book, a tarot deck and a stack of dice, plus a journal.
Cards deal you the events of the year, and when something risky happens you add a die to a tower that gets less stable as you go. It is $18.00 or more digitally, and the story runs in six volumes at an hour or two each, with every volume closing on a letter home to your witch’s mentor. As a best solo rpg to carry through a long autumn, nothing else here comes close.
Wrong for you if you do not own a tarot deck and do not want to buy one. Harrison says an ordinary deck covers most prompts, but the characters are named for the major arcana. Koriko on itch.io, and how to actually finish it.
7. Notorious, the best solo rpg pick if you want less writing
You are a bounty hunter taking a contract from one of six factions, and the job is to bring the target back. Jason Price asks for two six-sided dice and a character sheet, both supplied, and the sheet alone is a free download.
It is $10.00 or more, and it ships with two ways to play: a fast mode for people who want the chase, and a story mode for people who want to write it up. That second mode is why it keeps getting recommended to anyone who says the journaling half feels like homework.
Shawn Tomkin’s game is the one a tabletop player would recognise, and the full digital edition is free from his own site. You need one six-sided die and two ten-sided dice, and you can play it alone, with friends, or with somebody running it.
You swear a vow, then every risky action is a roll of those three dice against your character’s strengths, and the result tells you whether the story bends your way. It won a Gold ENNIE for best free game, and it is the deepest game on this best solo rpg list by a distance.
Wrong for you if you want to be writing within ten minutes. There is a lot to read first, and it is the one place on this list where a rulebook really does feel like a rulebook. Ironsworn at Tomkin Press, and our step-by-step first session.
Choosing the best solo rpg is the hard part. Playing it is easier.
Two more that get called the best solo rpg
Thousand Year Old Vampire comes up in every one of these conversations. Tim Hutchings has the digital edition at $15.00 or more, with free copies for anyone who cannot pay, and you play a vampire across centuries. The reason people talk about it is that your vampire holds five memories, so remembering one thing means losing another. It is superb and it is bleak, so it is a strange place to start.
The Wretched, by Chris Bissette, is the other one. You are the last survivor on a salvage ship, and it is played with a deck of cards, a tumbling block tower and a microphone, because you speak your log aloud rather than writing it. Wonderful, and not what most people on this page came looking for.
One evening of a best solo rpg, written up as one spread.
A page. Usually one spread with a card or a scrap stuck down and a few paragraphs in your own hand, plus a note of where you got to so the next evening has somewhere to start.
Which is the best solo rpg if I have never done this before?
The best solo rpg for a complete beginner is Alone Among the Stars, and you can pay nothing for it. It takes a few minutes, it needs only a pack of cards and one die, and by the end of it you will know whether writing to a prompt is something you enjoy. If it is, Apothecaria is the one most people move to next.
Are any of them really free?
Three of the eight are. Alone Among the Stars and Last Tea Shop Classic are name-your-own-price and you can set that to nothing, and Ironsworn’s full digital edition is free from the publisher. The other five run from $10.00 to £35.00 depending on whether you want paper.
Do I need dice, or can I use cards?
It depends on which best solo rpg you pick, and both are common. Apothecaria and Colostle use a deck of playing cards with no dice at all, Last Tea Shop and Notorious use six-sided dice, Alone Among the Stars uses both, and Koriko wants a tarot deck alongside its dice.
What if I do not want to write very much?
Then the best solo rpg for you is Notorious in its faster mode, or Alone Among the Stars, where a few sentences per card is the whole instruction. Nothing on this list checks your word count, and several people in this hobby draw far more than they write.
Is there a cosy one, and is there a creepy one?
Apothecaria and Koriko sit at the cosy end of this best solo rpg list, both witchy and slow in a way people like. Last Tea Shop is quiet but it is about dying, Notorious is dusty and violent, and The Wretched is outright horror, so there is a good spread if you want the lights on or off.
I bought one months ago and never started. What now?
Open the best solo rpg you already own at its first prompt and write three sentences tonight, badly. The most common thing in this hobby is a printed game and an empty journal, usually because the first page feels like it has to be good. It does not have to be, and the second page is always easier than the first.
Pick a best solo rpg and give it an evening
The shortest way through this page is to take a free one, use the book already sitting in your stash, and see whether you want a second evening. Whichever of the eight you land on, the writing is only half of what ends up on the page. The papers you stick down are the other half, and ours live in The Faded Conservatory.